Animation Timeline

Turning On and Off Animation Mode
- Click the "Animation Mode" button shown as the star icon at the top right of the editor window to show the animation timeline.
- Adding an animation preset asset from the asset library will also automatically show the animation timeline.
- When exiting and reopening the scene, the display state of the animation timeline is retained.
- Click the "Animation Mode" button again when the animation timeline is on to turn it off. The currently playing animation will stop, and the scene time will reset to zero.
Animation Timeline Interface
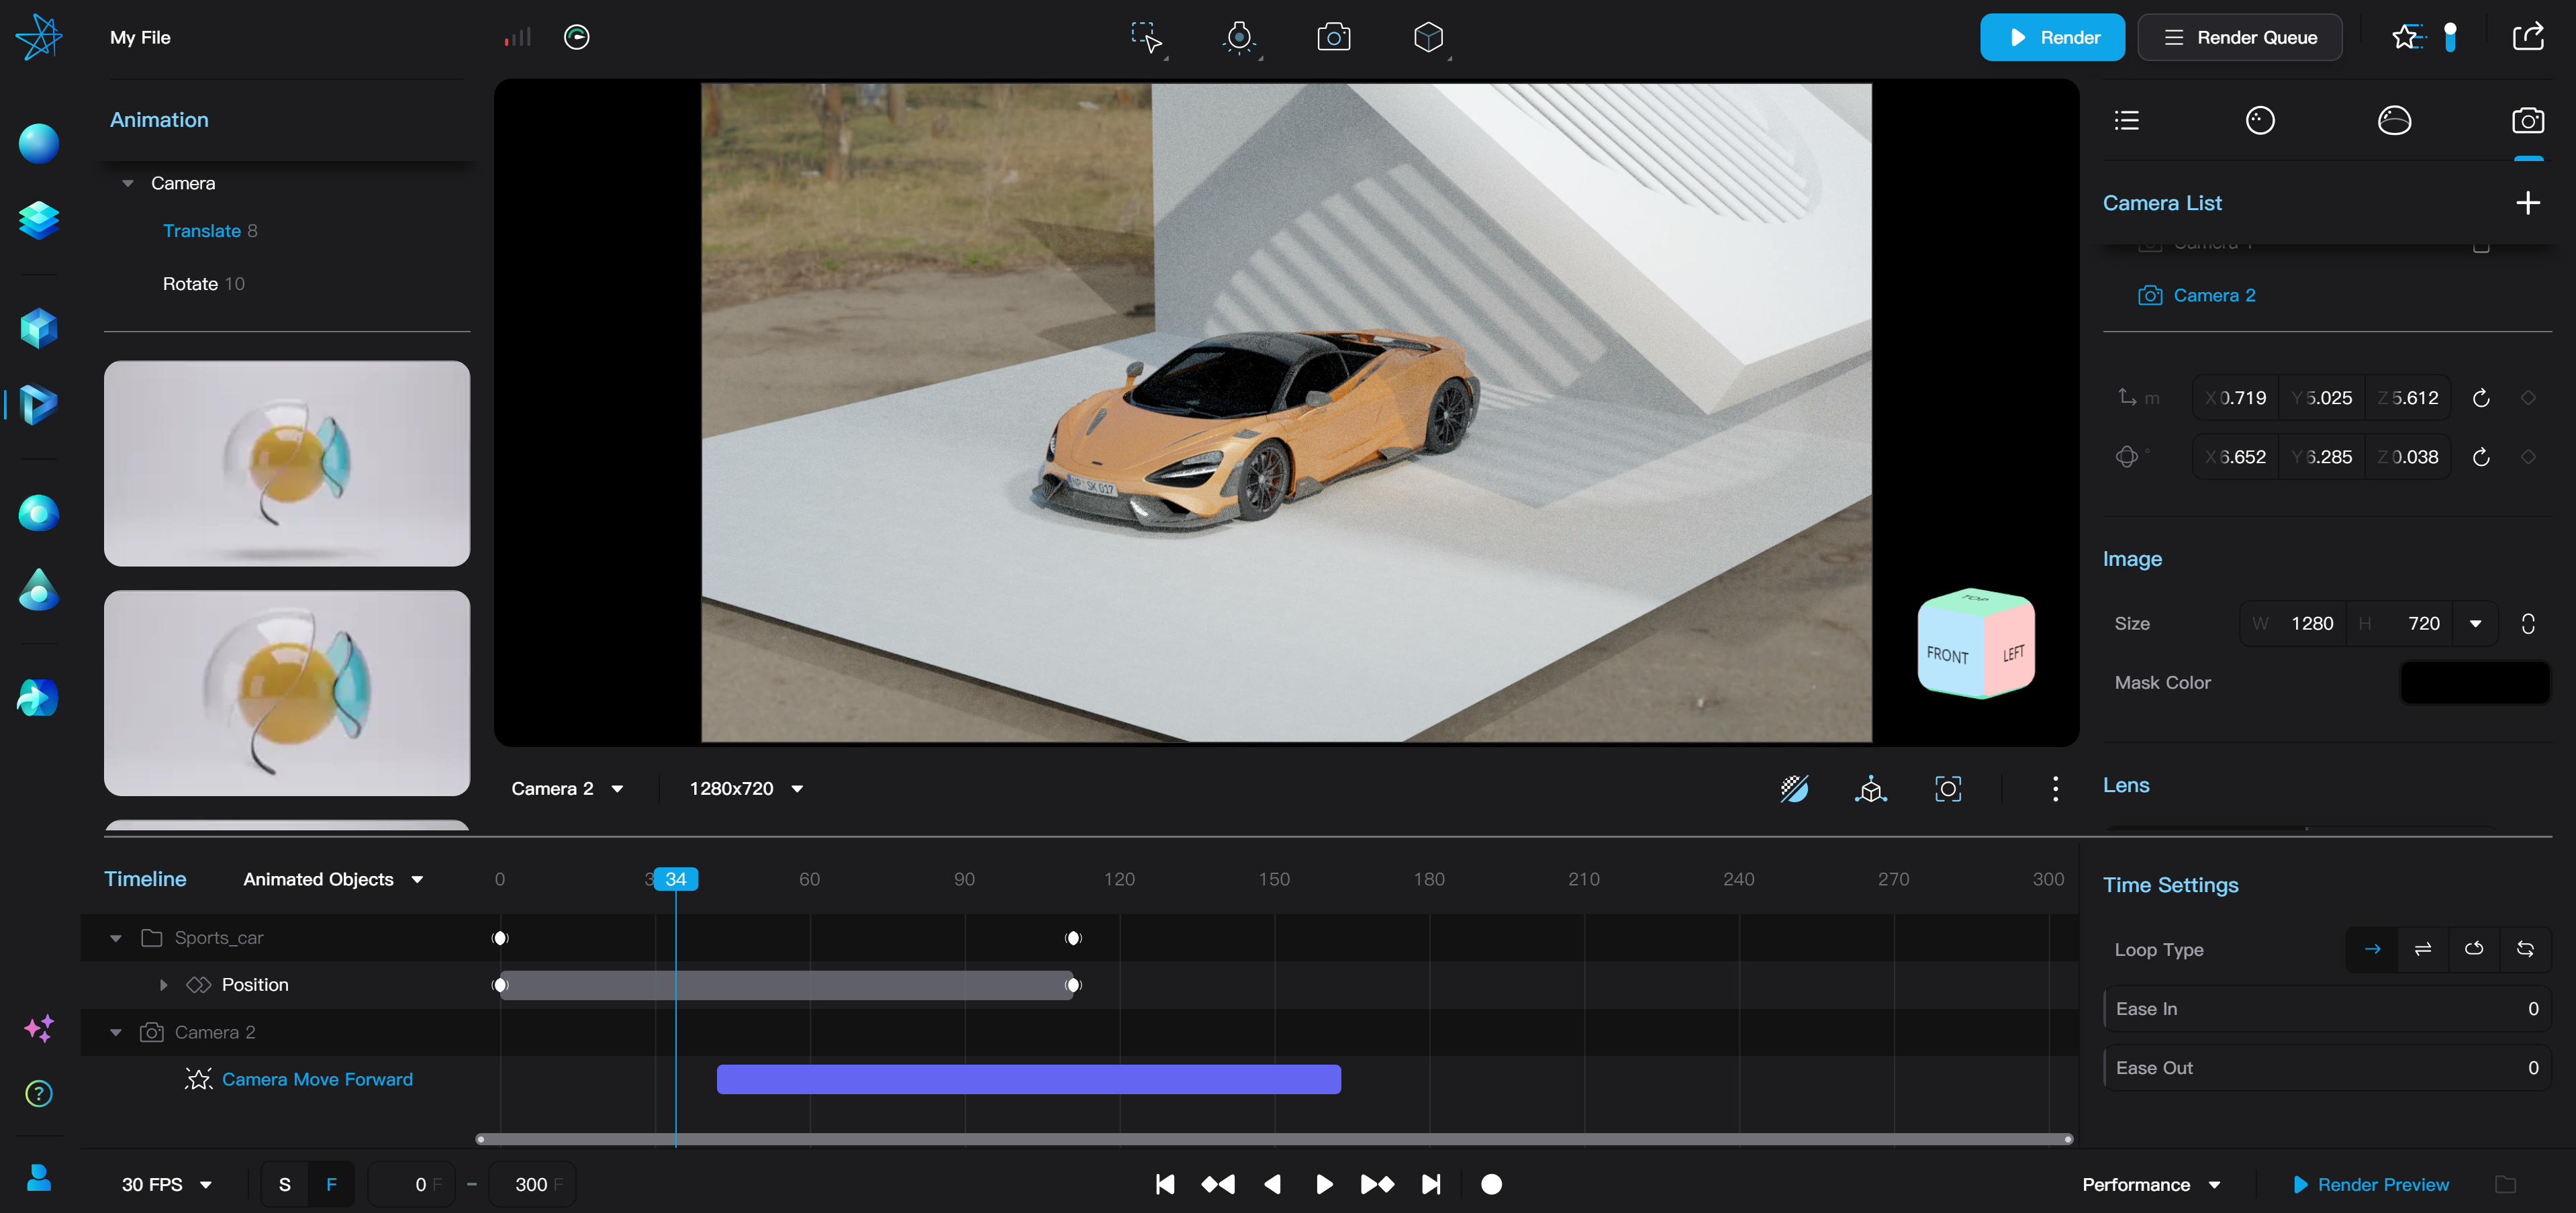
- Upon entering Animation Mode, an Animation Timeline appears at the bottom of the editor interface, and Keyframe Buttons are displayed on the right sidebar for scene and camera parameters.
- Dragging the divider line between the viewport and the animation timeline can change the height of the timeline interface.
Animation List
- The left side of the timeline is the animation list. The animation list be filtered to show all animations in the scene or only animations of selected objects.
- The animation list has 3 levels: object, property, and vector. Both object and property levels can be expanded and collapsed.
- Multiple animations of the same object are under the same object level, allowing batch editing of the object's animations in the corresponding row of the timeline operation area.
- Clicking on an object property or vector component in the animation list selects the corresponding animation clip. When an animation clip is selected, the object in the scene is also selected.
Timeline Operation Area
- You can use the bottom of the timeline operation area to adjust the display range.
- The current time in the scene is marked with blue highlights. Clicking or dragging at any position on the timeline scale can jump to the current time.
- Clicking on an animation clip in the timeline selects property-level or vector-level animation clips. Holding Ctrl/Cmd or Shift while clicking allows multi-selection of animation clips. Object-level animation groups cannot be selected.
- Dragging the left and right endpoints of an animation clip changes the start and end times of the animation. Dragging the middle area of a clip shifts the timing of the animation clip. Within the animation of the same object property, vector-level components cannot be dragged individually.
- All animations of an object are displayed as an animation group in the timeline operation area. Although the animation group cannot be selected, dragging its left and right endpoints and the middle can change the timing of all animations of the object. The time range of the animation group updates with the object's current animations.
- Clicking on a keyframe in the timeline selects the keyframe. Selecting a keyframe does not affect the selection status of scene objects.
- Dragging a keyframe moves its time. Dragging a keyframe in the object group moves all keyframes at that time in batch.
- Holding Ctrl/Cmd or Shift while clicking allows multi-selection of keyframes, but keyframes and animation clips cannot be selected simultaneously.
- Animation presets only display a bordered animation clip without showing keyframes. Keyframe animations display each keyframe, and they can be dragged individually. If keyframes are dragged out of order or beyond the current animation clip's time, the animation clip length and keyframe order is automatically recalculated.
Timeline Control Bar
The timeline control bar at the bottom of the window provides scene settings and animation playback control options related to animation, including:
- Select the FPS (frames per second) used by the timeline. After switching FPS, the speed and actual duration of the animation remain unchanged, but the number of rendered frames changes. However, animations above 30 FPS will be played or rendered at 30 FPS during real-time playback in the 3D viewport and rendered preview videos.
- Unit of the timeline can be switched between frames (F) or seconds (S). When using seconds as the unit, the timeline display and input seconds only keep 2 decimal places.
- Modify the start and end frames of the animation. The start frame cannot be a negative number.
- Playback control buttons, from left to right: jump to the start time of the scene, jump to the previous keyframe, play in reverse, play forward, jump to the next keyframe, jump to the end time of the scene, turn on or off the Auto Keying mode.
You can render a preview video of the animation in the bottom right corner. Click the "Render Preview" button to start rendering the preview. During this time, the 3D viewport is disabled, and you have to wait for the preview video to complete render.
You can also use the following shortcuts to control the timeline:
- Spacebar: Play and pause playback.
- Left/Right Arrow Keys: Jump to the previous/next frame.
- Alt/Option + Left/Right Arrow Keys: Jump to the previous/next keyframe.
Animation Parameters
The right side of the animation timeline panel is the animation parameter bar, where you can adjust animation effects.
- When you select an animation clip, the parameters you can adjust depend on the type of animation. Selecting an animation preset reveals its specific parameters, whereas selecting keyframe animations will only display options for animation looping.
- When a keyframe is selected, the animation parameter bar shows the easing settings for the keyframe.
- Detailed parameter settings for animation clips and keyframes can be found in the “Edit Animations” page.
Regardless of whether a animation preset or a keyframe animation is selected, you can adjust the animation's loop mode in the parameter bar. The loop modes for animation include:
- Once: The animation stops after playing once.
- Once with Return: The animation plays once, then plays in reverse back to the start.
- Loop: The animation jumps back to the start for looping playback after playing once.
- Loop with Return: After playing and reversing once, the animation starts from the beginning for looping playback.
Tip for Using Looping Animations
- For objects that rotate continuously at a constant speed, you can add a 360-degree rotation animation and use the "Loop with Return" mode.