Material Settings
Material List
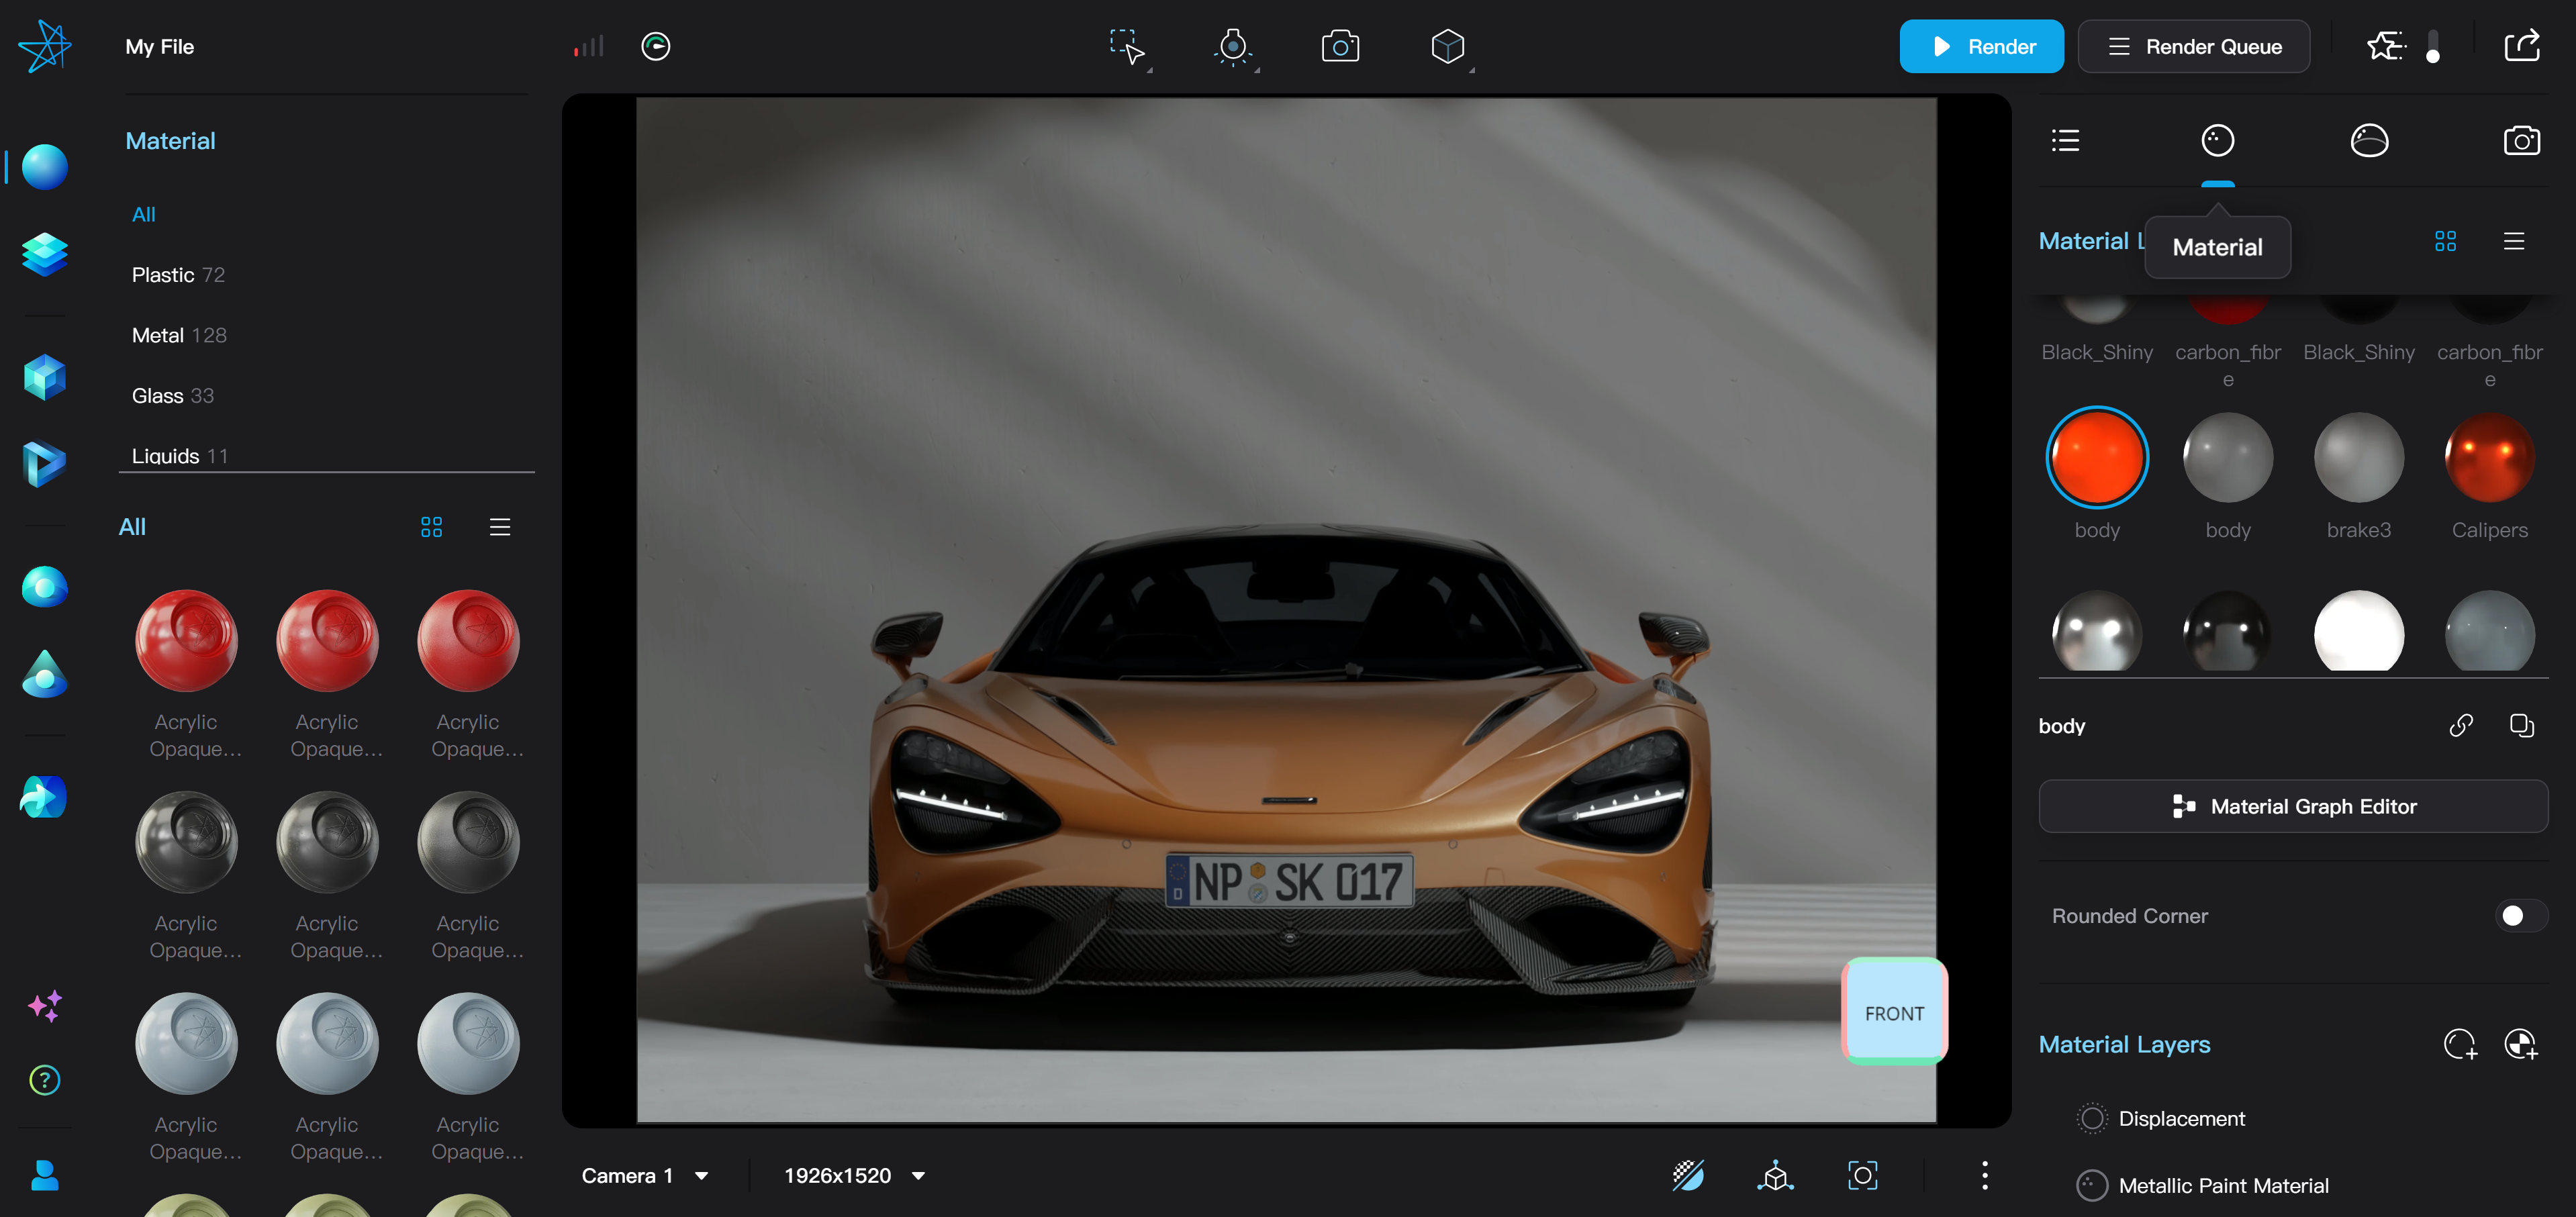
The second tab on the right side of Taitopia Editor is the Material Settings bar. Here, you can select, edit, and save materials.
Display and Select Materials
- When no object is selected in the scene, the material list displays all the materials in the scene.
- When one or more objects are selected, the material list displays the materials used by the selected objects.
- Clicking on a material in the material list selects it for editing. When hovering the mouse over a material in the list, objects using that material will be outlined in orange.
- The material list can be switched between grid and list display.
- Dragging the divider line below the material list changes the height of the list.
Copy Materials
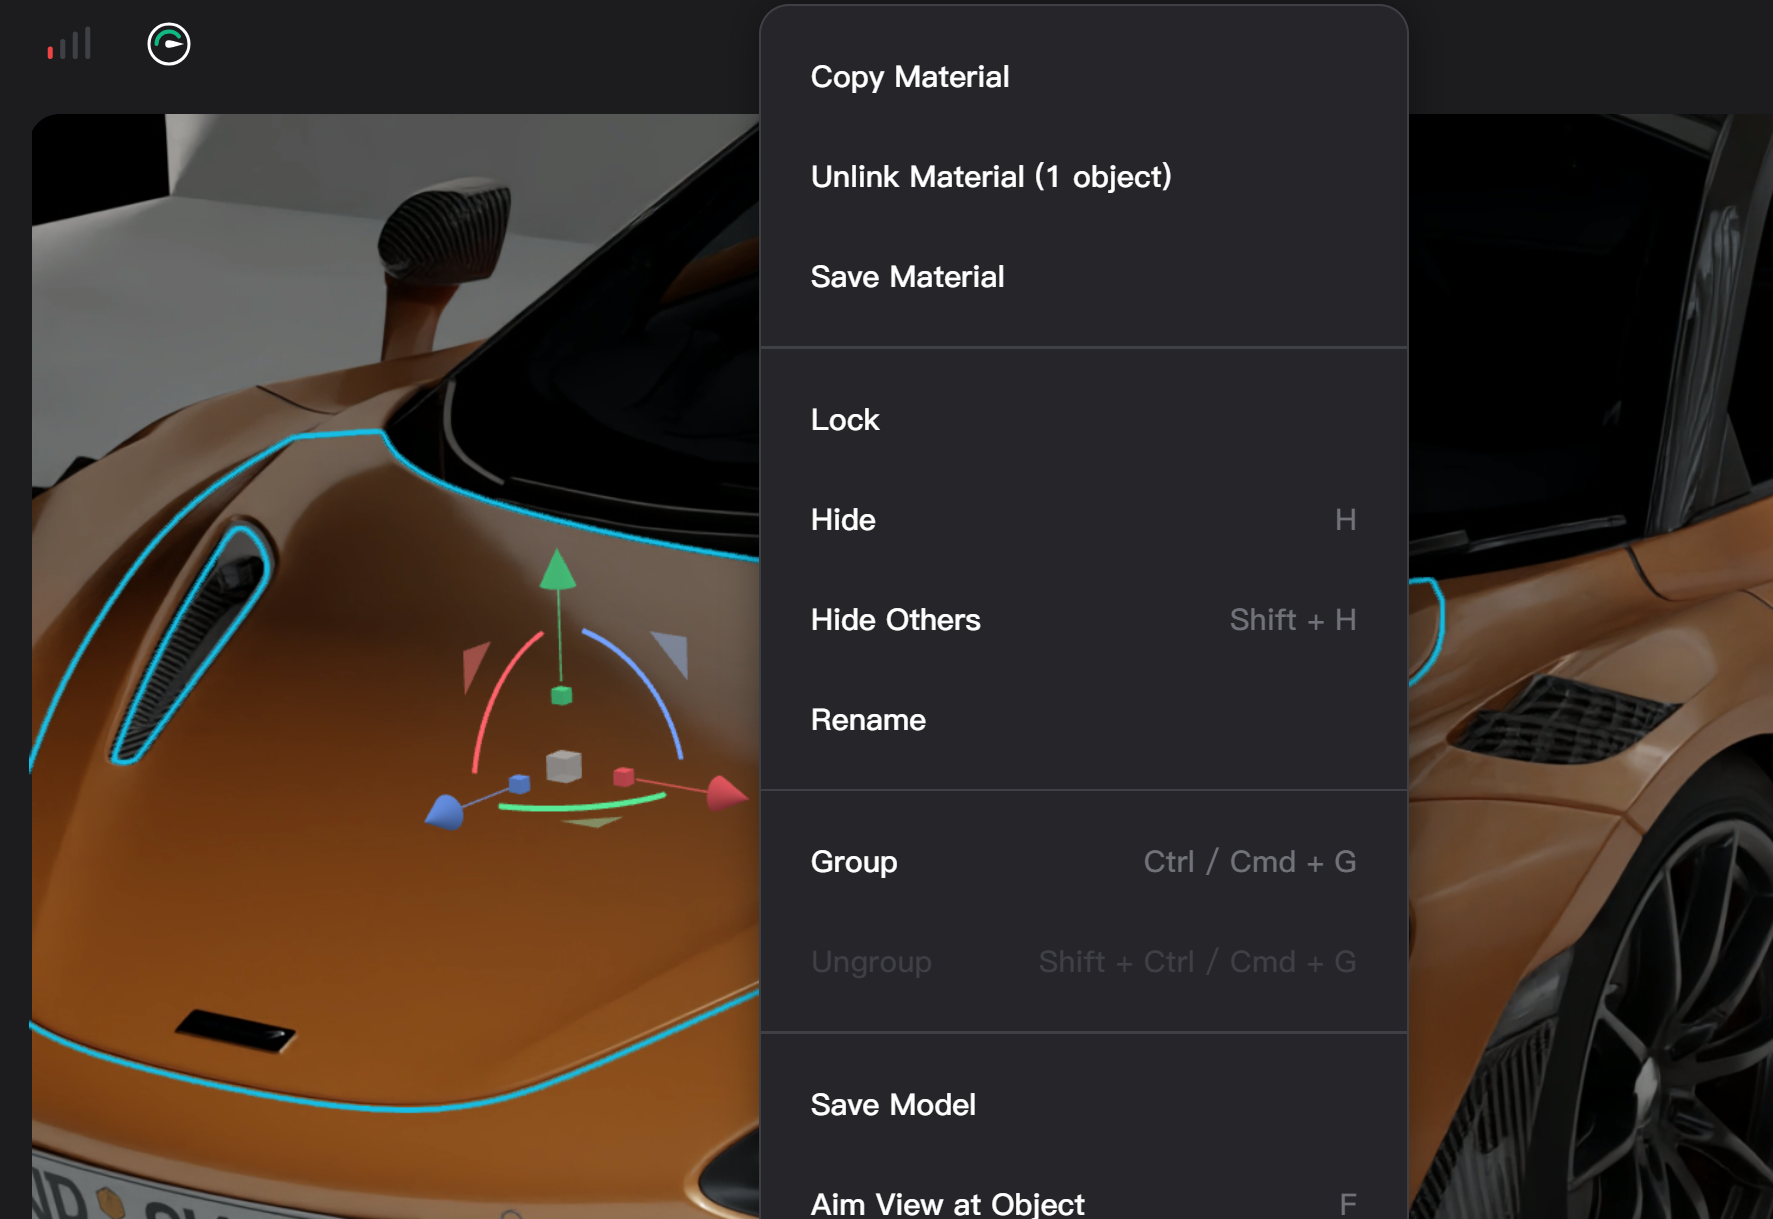
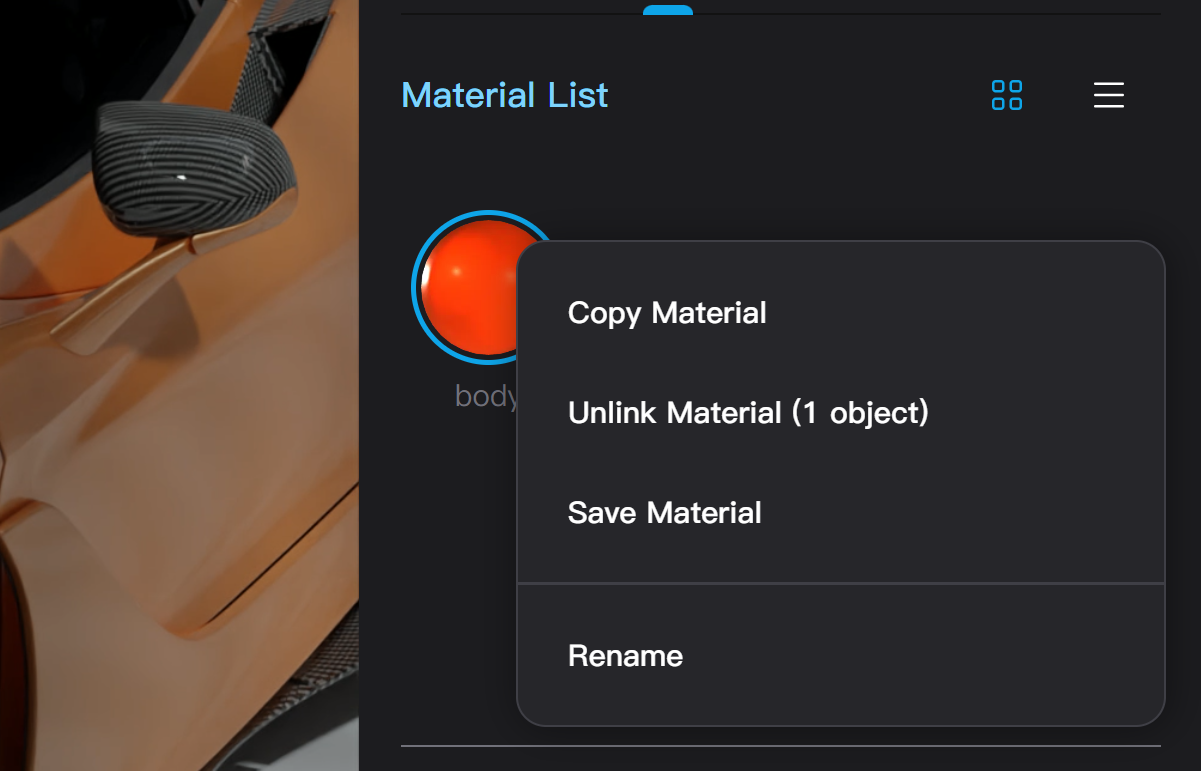
- In the material list or the right-click menu of the selected object in the viewport, selecting "Copy Material," clicking the "Copy" button next to the material name, or using the Alt/Option + C shortcut key can enter the copy material mode.
- In this mode, clicking any object in the scene copies the currently selected material to that object. After completing the material copy, clicking the "Save" button at the top of the viewport or pressing the Esc key exits the copy material mode.
Unlink Materials
- Multiple objects can use the same material, linking their material settings together; editing the material parameters of one object affects all objects using that material.
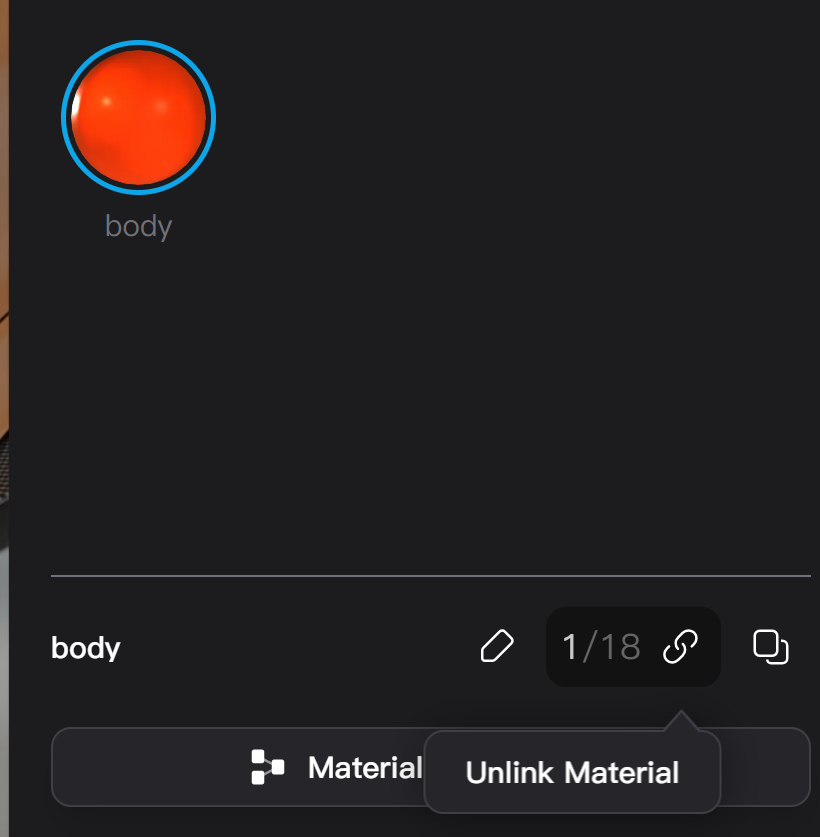
- To adjust the material of a linked object individually, select the object, then in the material list or right-click menu, click "Unlink Material" or the "Unlink" button next to the material name.
- If no object is selected, unlinking a material directly from the material list unlinks all objects using that material, creating a separate material copy for each object.
- The right-click menu and hover over the "Unlink" button will display the number of materials generated after unlinking. For example, hovering over the "Unlink" button shows "4/8," indicating that 8 objects use this material, and 4 are selected, generating 4 new unlinked materials.
Rename and Save Materials
- In the right-click menu of the material list, or by clicking the "Rename" button that appears when hovering over the material name, you can open a renaming dialog box to change the name of the material.
- Selecting "Save Material" from the right-click menu of the material list or the viewport with the object selected saves the currently selected material to your personal asset library. After clicking save material, the editor enters save mode, where you can edit the material's preview image and change the saved material's name.
Editing Basic Material Parameters
Taitopia has two material systems: Basic Materials and Node Materials. Basic Materials support single-layer image textures, while Node Materials support more complex material effects, including multi-layer mixed materials, label textures, smart textures, displacement maps, etc.
Rendered Round Corners
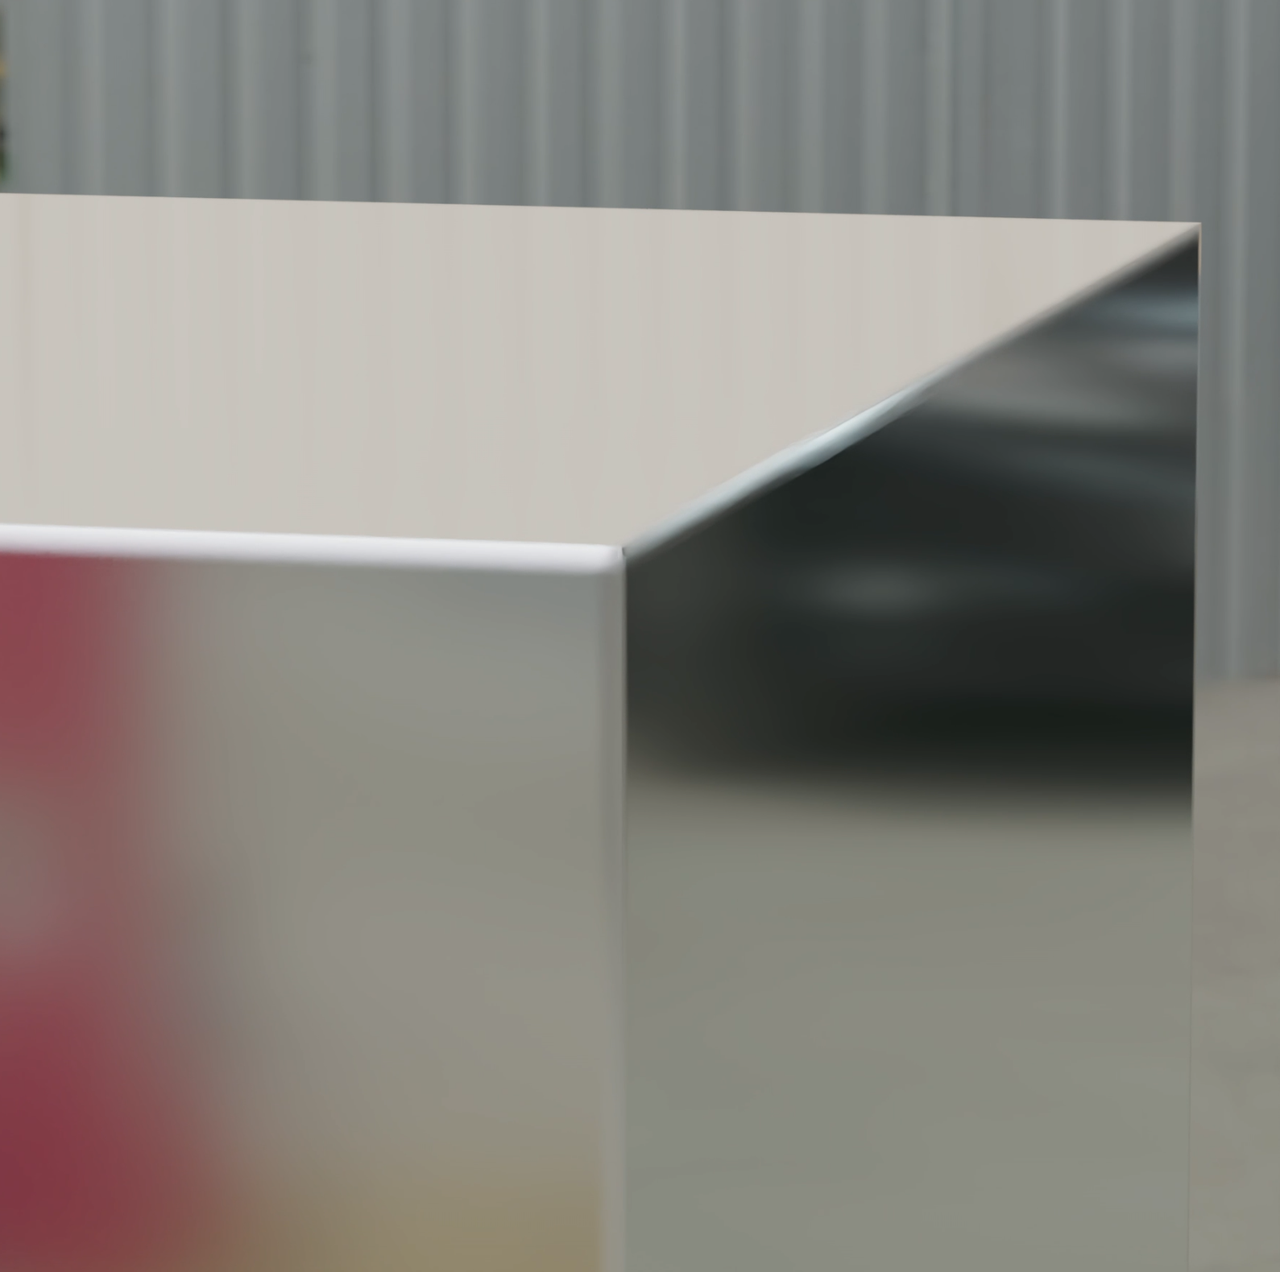
- Turning on the "Rounded Corners" switch smooths the edges of hard surface models to create rounded corners. After turning on round corner rendering, you can adjust the radius of the corners (in cm). The effect of turning on and off round corner rendering is shown below:
[Two images comparing the effects of round corner rendering turned on and off]
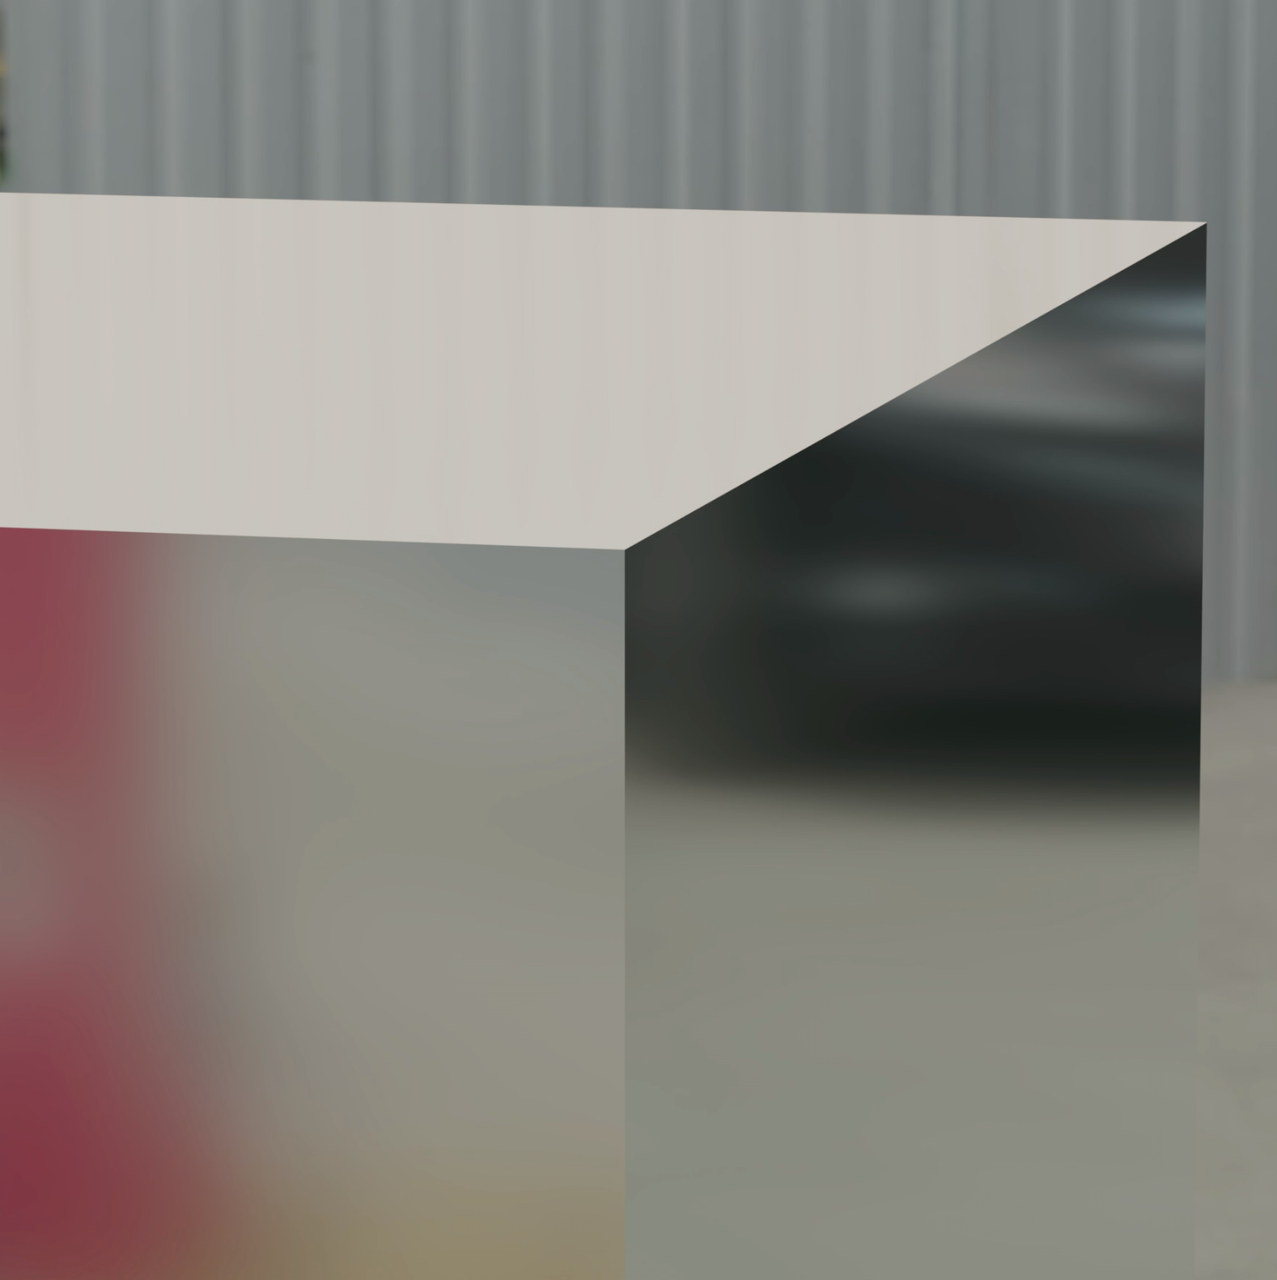
- Turning on and off round corner rendering requires reloading the material. Materials being loaded are displayed with a checkerboard texture. You can still perform other scene editing operations while the material is loading. The material will refresh automatically once loaded.
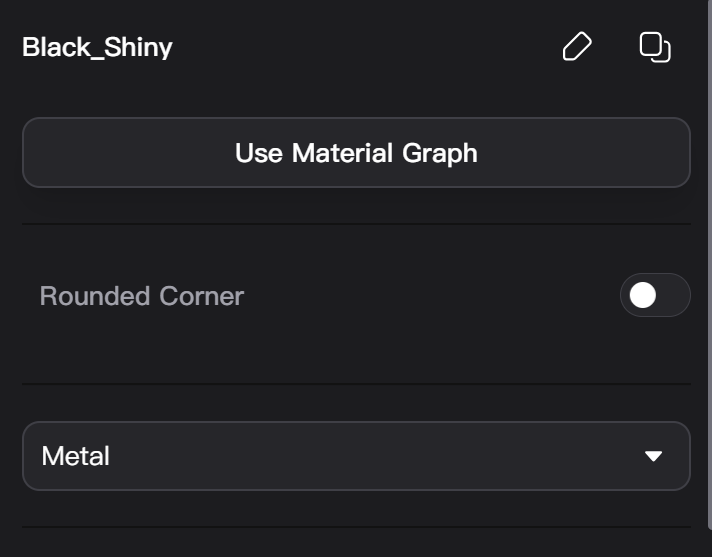
Basic Material Type Settings
In Basic Materials, you can quickly select corresponding material parameter presets from the material type dropdown menu. Selecting different types of materials in the Basic Material type menu only changes the values of the parameters of the Basic Material instead of changing the types of available parameters.
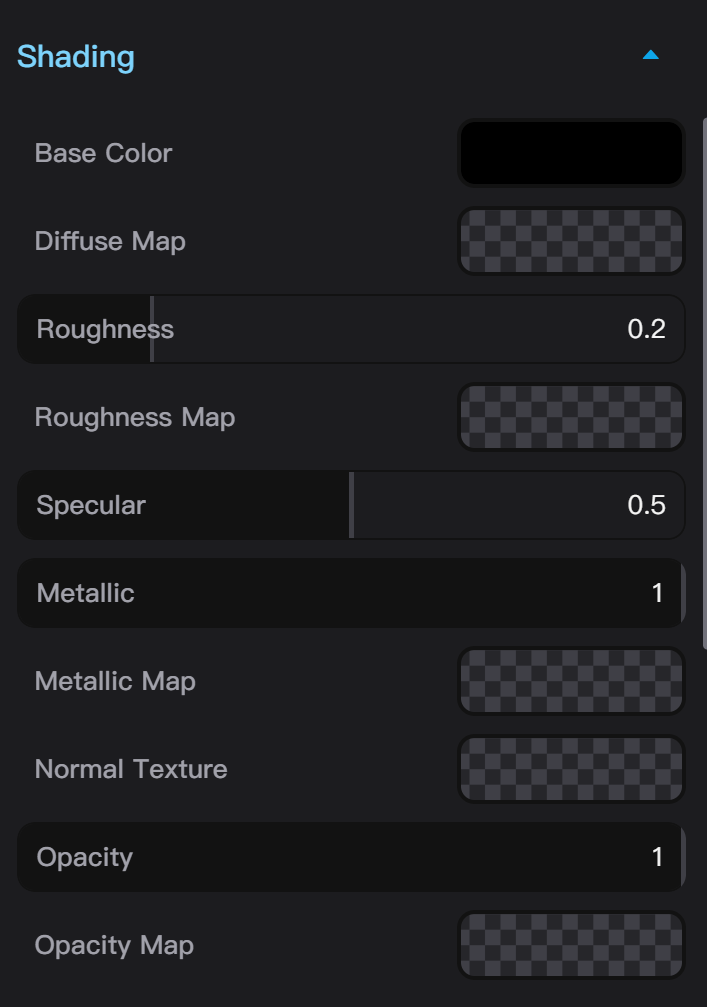
Basic Material Shading Settings
Basic Material shading settings include the main parameters and textures in the PBR material workflow, including base color, roughness, metallic, normal map, and opacity. You can adjust these parameter values or add textures to these channels. Basic Material's base color and base color texture can coexist; if the base color is not white, the hue of the base color will be added to the base color texture.
Basic Materials do not support grayscale bump maps. If you need to use a bump map, please switch to Node Materials by clicking the “Use Material Graph” button.
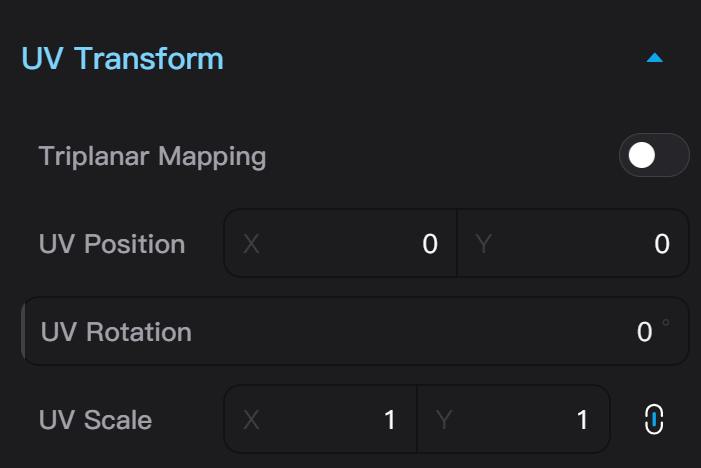
Basic Material Texture Transform
Basic Material's texture transform includes the switch between using UV projection and tri-planar mapping, as well as texture's UV translation, rotation, and scaling parameters. If your model has not undergone UV unwrapping (click the exclamation mark icon in the top right corner of the asset library upload model, a window shows "Object has no UV data"), you need to turn on tri-planar mapping to display the texture properly.
Basic Material's texture scaling is opposite to the scaling of scene objects and Node Materials' textures. The larger the texture scaling in Basic Material, the higher the
texture density, and the smaller the texture image appears on the object.
Other Parameters of Basic Materials
In addition to standard PBR parameters, Basic Materials can also set parameters for refractive transmission, subsurface, emission, coating, sheen, and anisotropy. Parameters in Basic Materials to which textures can be added include: base color, roughness, metallic, normal map, opacity, and emission.
Under Development - The Taitopia team is improving the rendering effect of emissive materials. In the current version, please note:
Compared to physical light sources added from the top toolbar, emissive materials can also illuminate the scene but will produce more rendering noise than physical light sources. If you wish to turn off denoising in the rendered output, you may need a high number of samples to eliminate noise. You can reduce the intensity of the emission and add a panel light or point light source at the corresponding position of the emissive material to reduce noise.
Tip - Rendering Window Glass Effect
Using the "Glass" category materials from the official asset library or adjusting the transmission material parameters results in the effect of solid glass refracting objects inside the glass, similar to looking through water at objects at the bottom. To accurately render the effect of single-layer window glass, turn off transmission, set roughness to 0, metallic to 1, then reduce the material's opacity, or use the "Window Glass" category materials from the official asset library.
Node Material Parameters
Clicking the "Use Material Graph" button in the basic material settings converts a Basic Material into a Node Material. Node Materials can achieve more complex effects. Node Materials use a node graph to represent the composition of the material. You can fully customize materials using the material node editor or directly edit the parameters of the node material in the material settings bar.
Under Development - The Taitopia team is upgrading the engine architecture for a complete transition from Basic Materials to Node Materials. In the current version, please note:
- Node Materials consume more rendering resources, increasing memory usage and slowing down rendering. Therefore, if there is no need to use unique features to Node Materials, keeping using Basic Materials is recommended.
- The opacity channel texture of Node Materials does not produce shadows. If you wish to control shadows through the opacity texture (such as the texture of leaves in plant models), you need to use Basic Materials. You can create a new cube from the top toolbar, whose default material is a basic material, then add your texture to this material.
- Dragging textures from the official texture library onto objects will automatically trigger the conversion to Node Materials. If you do not wish to perform such conversion, you can drag the texture directly into the texture upload window of the material settings bar.
The following features are exclusive to Node Materials and are not supported by Basic Materials:
- Bump map
- Displacement map
- Multi-layer mixed materials
- Label textures
- Noise and gradient textures
- Smart textures
- Interactive texture placement (Place Texture mode)
- Cylindrical and spherical texture projection
Round Corners in Node Materials
Node Materials also provide the Rounded Corner feature, and its effect is completely the same as in Basic Materials. Turning on and off round corner rendering requires reloading the material.
Material Layers
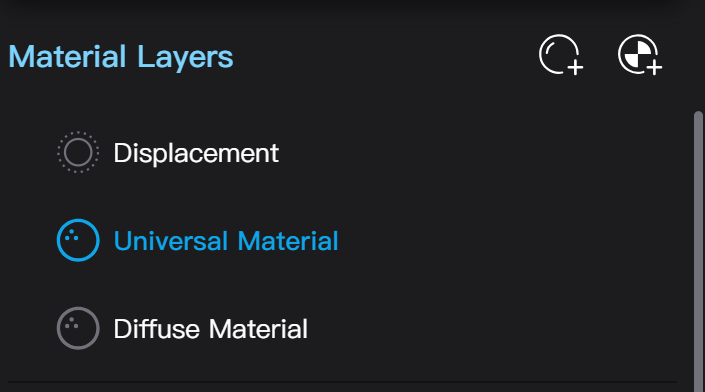
Node Materials support multiple material layers. In the Material Layers list, you can edit each layer of the material. Taitopia's node materials support up to 5 material layers (excluding the displacement layer).
The "Displacement" layer represents the displacement map that changes the position of geometry vertices and is fixed at the top of the material layer list, not movable or deletable. Other material layers can be moved up and down or deleted; materials lower in the list will cover materials higher up. The blending between layers of materials is controlled by the "Opacity" parameter. When all material layers are transparent, the entire material also renders a transparency effect.
Clicking the "Add Layer" button (ball with plus sign) in the material layer adds a new layer to the material. The newly added layer defaults to the "Universal Material" type. Clicking the "Add Label Layer" (ball with checkerboard and plus sign) button in the material layer uploads an image and adds a label layer. If the uploaded image has a transparent background, the transparency will also be effective in the label layer.
In the Material Graph Editor, adding a material layer means creating a new material type node and connecting it to the output node.
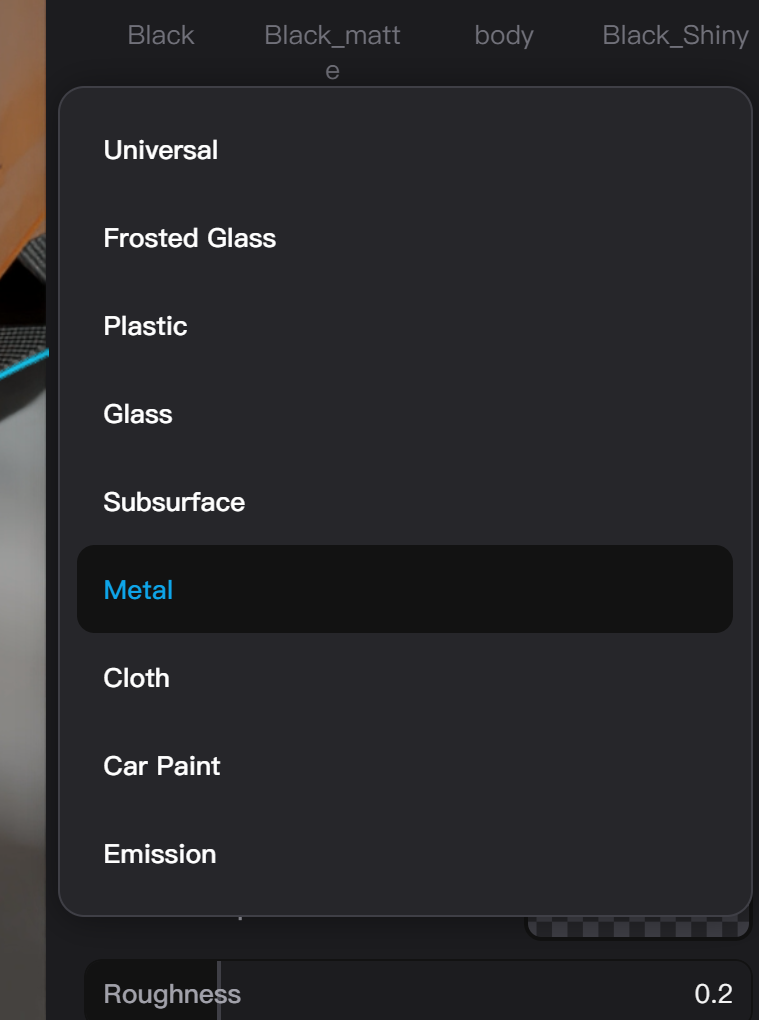
Node Material Type Settings
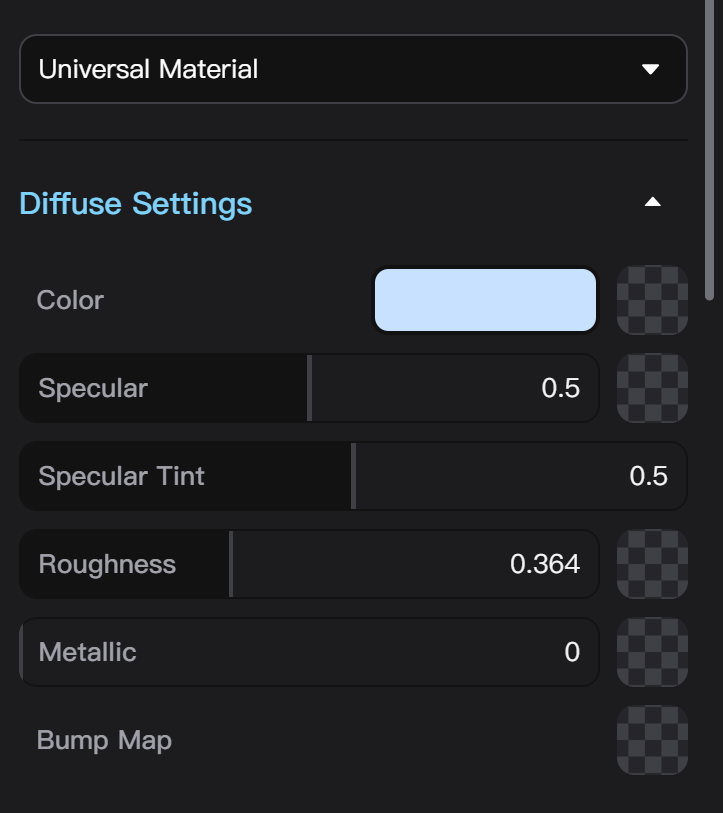
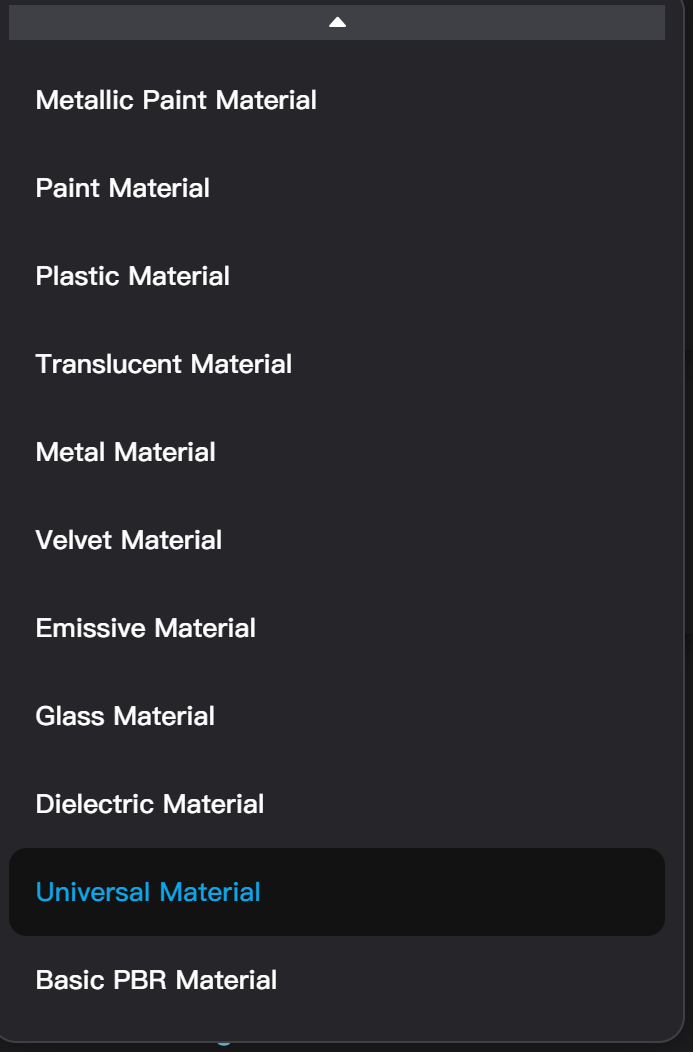
Node Materials also provide a dropdown menu to switch the type of material. Unlike Basic Materials, switching the type of node materials will change the adjustable parameters of the material. After switching the material type, parameters and textures with the same name as before will be retained, while new parameters will reset to their default values.
Universal Material includes the most complete parameter settings. Adding a material layer, adding a label texture, and converting a basic material to a node material all default to using Universal Material.
Diffuse Material, Plastic Material, Translucent Material, Emissive Material, and Glass Material are equivalent to a Universal Material that only expose a part of the parameters. Using them makes it more convenient to control the effects in the corresponding category.
**Metallic Paint Material, Paint Material, Metal Material, Velvet Material, and Dielectric Material **contain effects that cannot be achieved by adjusting Universal Material parameters, such as Metallic Paint Material being able to separately adjust the color of the paint and metal particles, and Dielectric Material being able to mimic dispersion effects.
In the Material Graph Editor, switching the material type means switching the type of the material-node connected to the output node.
Node Material Parameter Settings
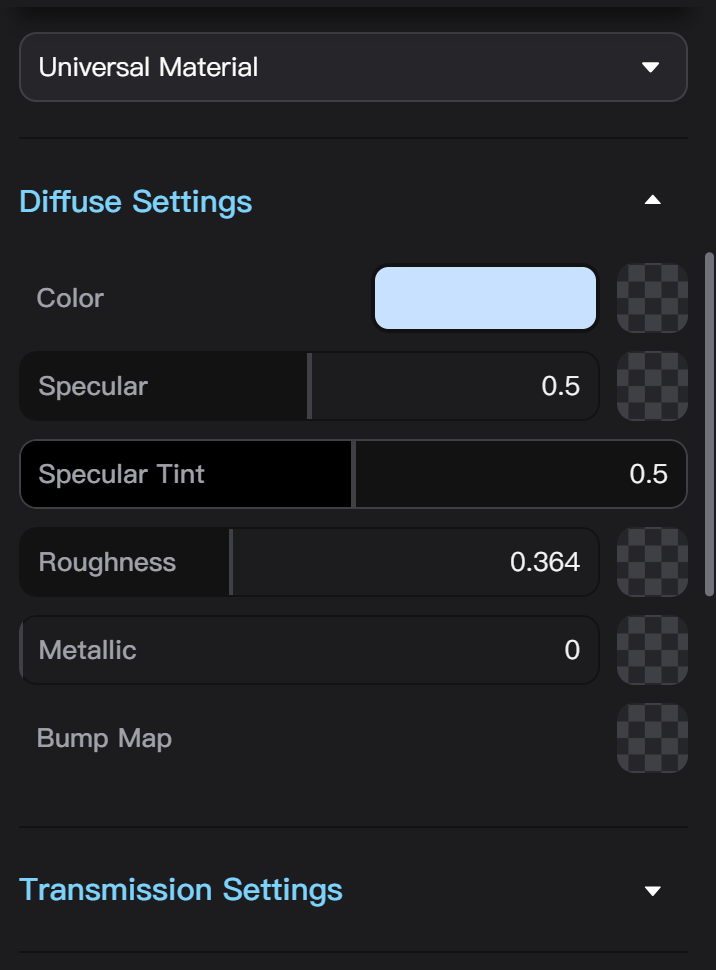
Each type of Node Material has is own set of adjustable parameters. If a texture can be added to a material parameter, there will be a texture upload button shown in checkerboard pattern next to the parameter value or color input. Clicking the button then select a local file or dragging a texture from the left sidebar asset library into the button box can add a texture to the parameter.
Parameters with textures display a thumbnail of the texture, no longer showing color or value input. Next to the texture thumbnail, Place Texture and Move Texture buttons will appear. Dragging a texture from the left sidebar asset library into the thumbnail box can replace the texture.
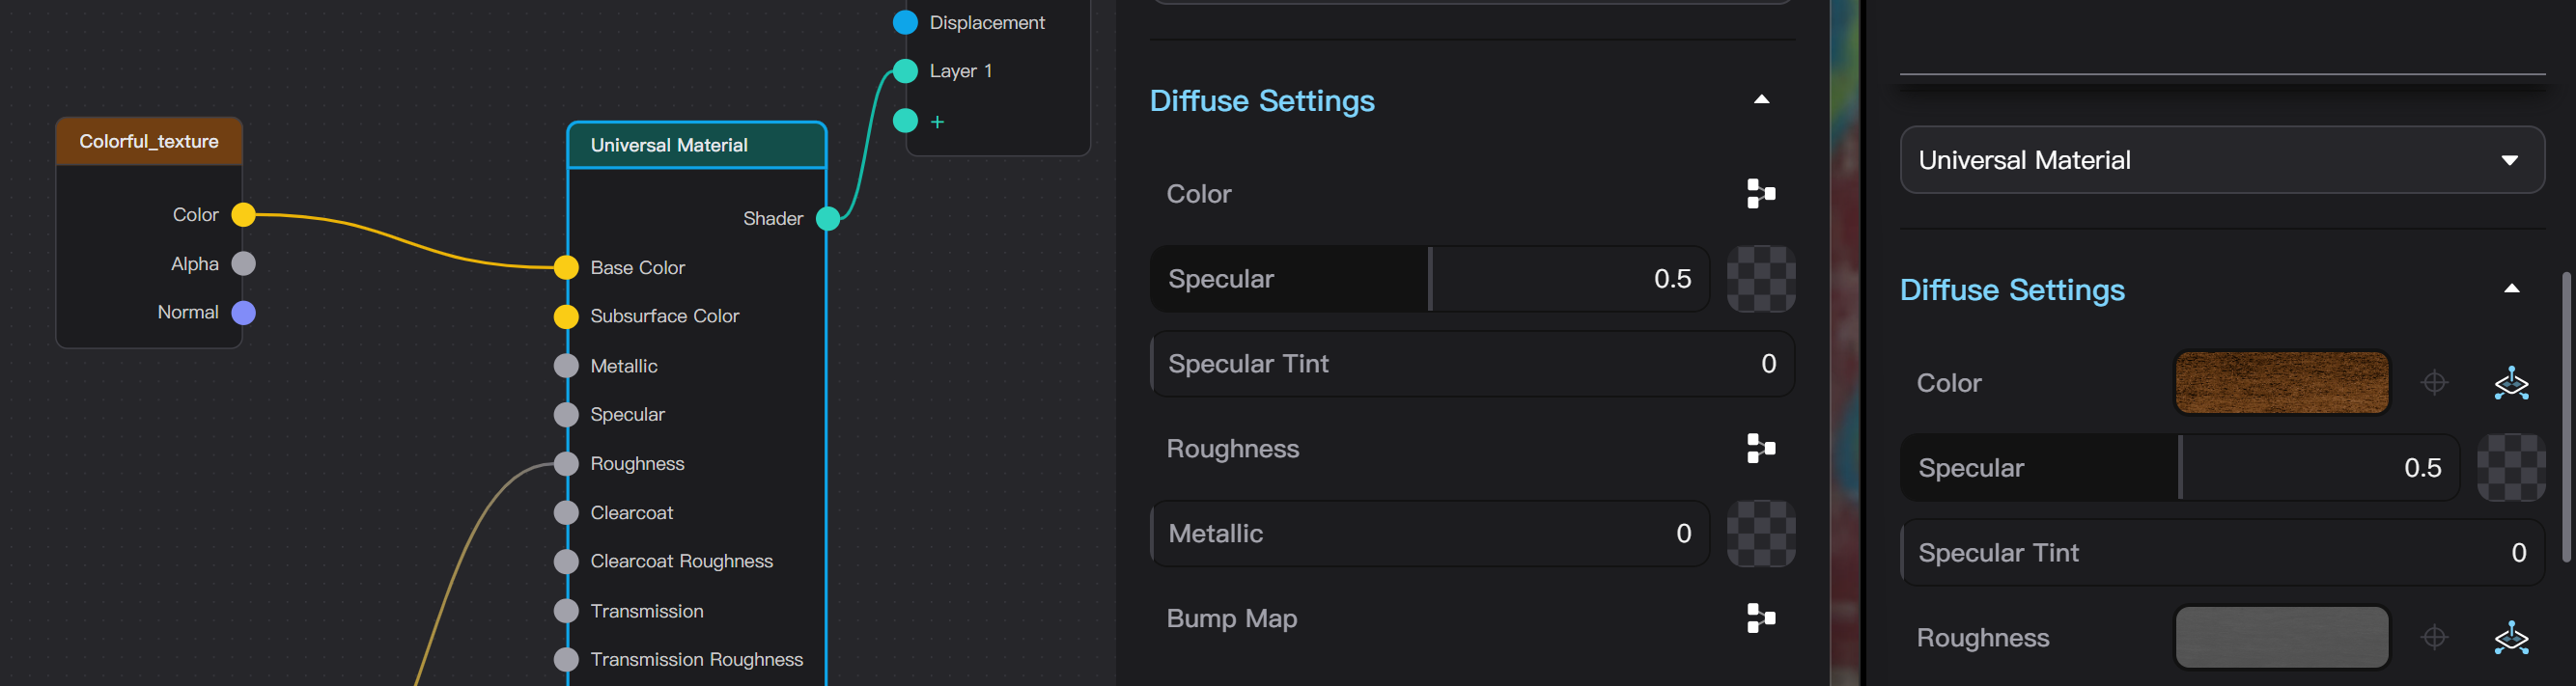

Each parameter that supports texture corresponds to a node socket in the Material Graph Editor that can connect incoming nodes; adding a texture means connecting an Image Texture node to this socket.
When the parameter is connected to a node other than Image Texture, such as Color Adjustment or any smart texture, the corresponding parameter input will be displayed as the Material Graph Editor button, and you need to open the graph editor to edit this parameter.
Node Material Texture Settings
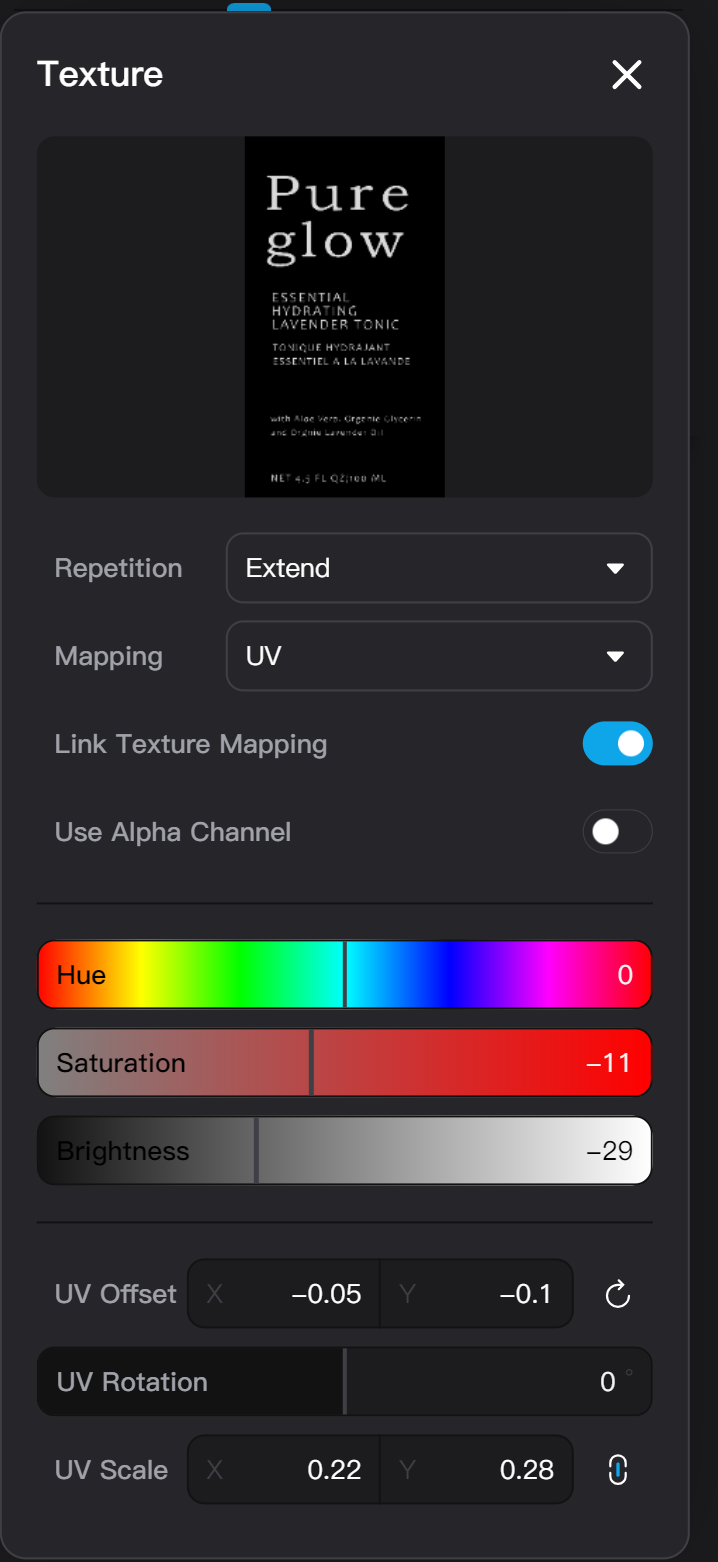
Clicking the texture thumbnail on parameter input row opens the texture settings pop-up.
The texture settings pop-up displays the complete thumbnail of the texture. Hovering the mouse over the thumbnail allows you to re-upload the texture, save the texture to your personal asset library, or delete the texture.
The Repetition parameter adjust how the texture is tiled on the model. Options include:
- Repeat: The texture is tiled periodically.
- Extend: Parts beyond the texture's original position range will extend using the color at the edge of the texture.
- None: Parts beyond the texture's original position range will display in black color.