Camera Settings
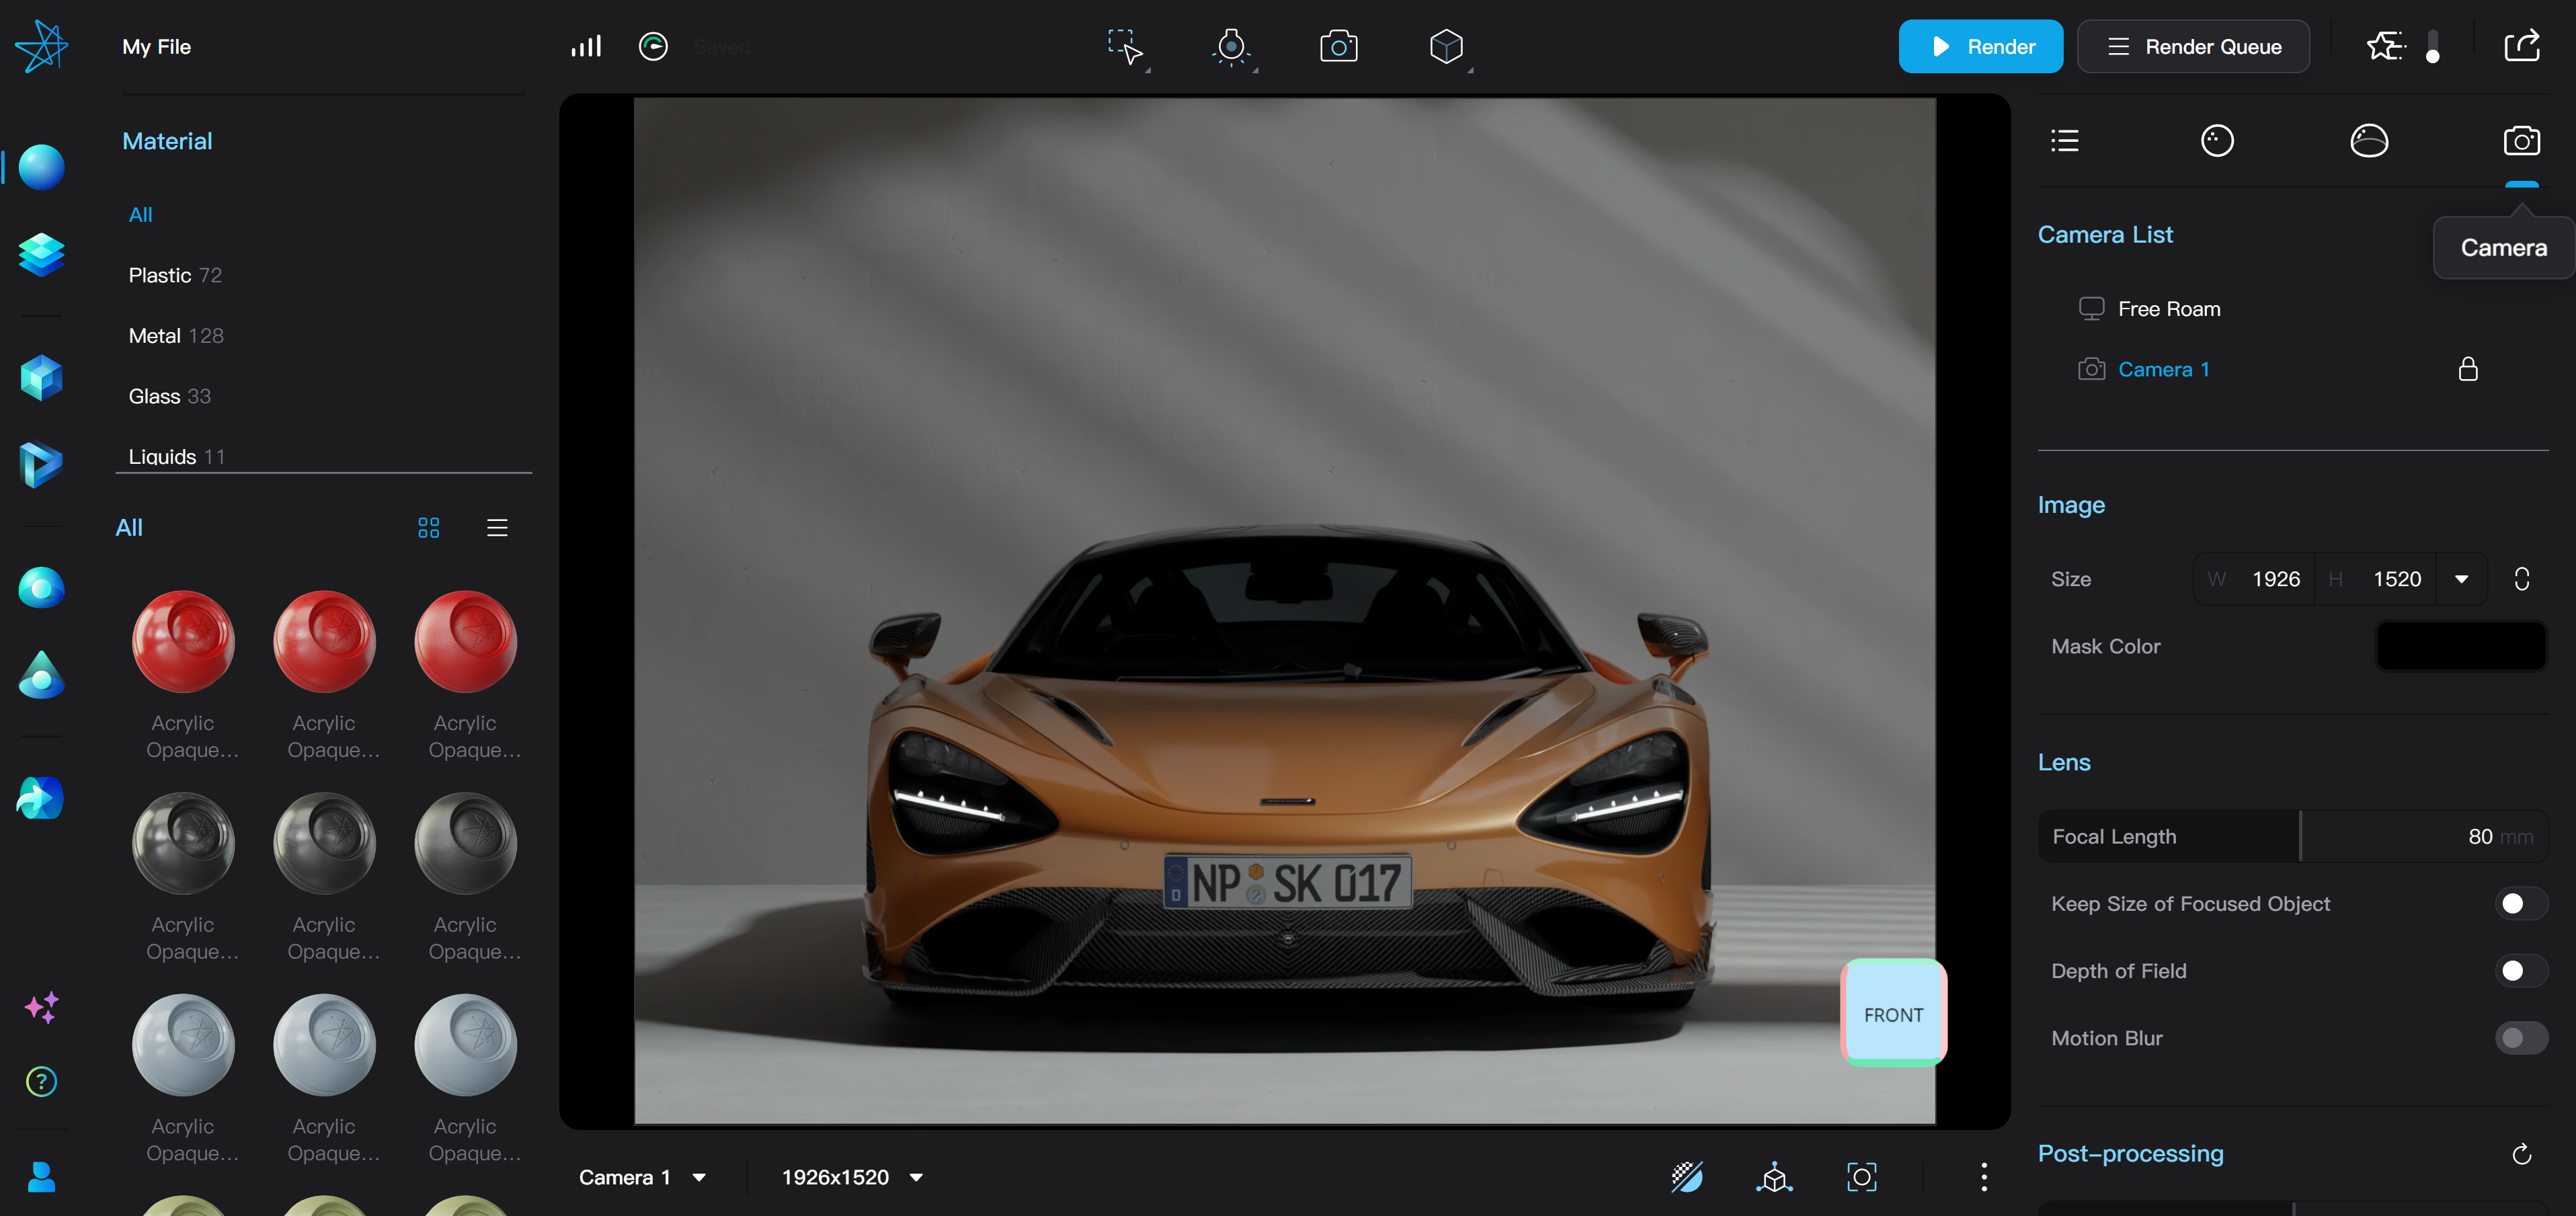
Activate a Camera
- Click on a camera in the camera list to activate a camera.
- Alternatively, you can also switch the active camera from the camera drop-down menu on the settings bar or press Q to loop through cameras.
Add a Camera
- Click on the Add icon at the top right of the camera list to add a camera.
- Alternatively, you can also add a camera from the top toolbar.
Duplicate a Camera
- Click on the Duplicate icon at the right of a camera’s row in the camera list to duplicate a camera.
- Alternatively, you can right-click on the corresponding camera position and then left-click on the "Copy" option that appears.
Lock a Camera
- Click on the Lock icon at the right of a camera’s row in the camera list to lock a camera. Click the Lock icon again on a locked camera to unlock it.
- Alternatively, you can lock or unlock a camera from the right-click menu of a camera in the camera list.
- The position and rotation of a locked camera cannot be changed by viewport controls or gizmos. When the active camera is locked, orbiting, panning, or zooming the viewport will automatically make the viewport return to Free Roam.
Delete a Camera
- Click on the Delete icon at the right of a camera’s row in the camera list to delete the camera. Deleting the active camera will automatically make the viewport return to Free Roam.
- Alternatively, you can delete a camera from the right-click menu of a camera in the camera list.
Rename a Camera
- Double-click on the camera name on a row in the camera list to rename a camera.
- Alternatively, you can rename a camera from the right-click menu of a camera in the camera list.
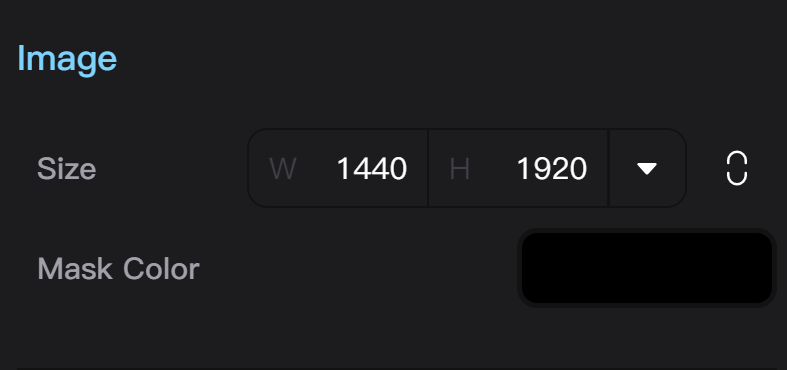
Camera Size and Frame Mask
- Resolution and aspect ratio of the camera can be adjusted by the Size parameter. A series of camera resolution presets can be found from the dropdown menu.
- Width or height of camera resolution should not exceed 4000.
- Color of the camera frame mask can be selected from the Mask Color parameter. The mask color is set to black by default and a lighter colored mask is recommended when working with very dark render backgrounds.
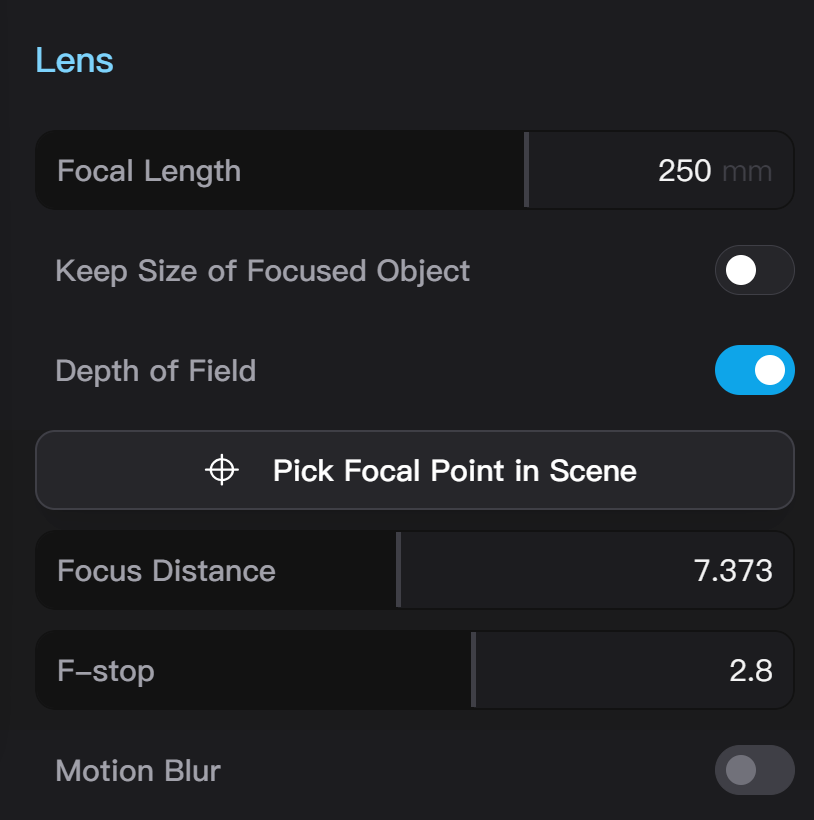
Lens*
-
Focal Length of a camera can be set in the unit of millimeters. The default focal length for an empty scene is 135 mm. The available range of focal length is 1-5000 mm.
-
When the focal point of a camera is set to the object in interest (Depth of Field needs to be turned on before setting focus distance), turn on the Keep Focused Object Size switch to maintain a constant size of the object in interest by moving the position of the camera during adjusting focal length.
-
Turn on the Depth of Field switch to activate lens blur effects for the camera.
- When Depth of Field is turned on,** Focus Distance **of the camera can be adjusted or directly selected from the viewport using the Pick Focal Point in Scene button.
- When Depth of Field is turned on, F-stop of the camera can be adjusted to control the intensity of lens blur. A lower F-stop gives a stronger lens blur. Note that Taitopia does not physically simulate camera apertures and changing F-stop does not affect exposure.
-
When animations are present in the scene, turn on the Motion Blur switch to activate motion blur effects for the camera. Motion blur effect will be displayed in both the 3D viewport and rendered images or videos.
- The strength of the motion blur effect can be adjusted by the "Shutter" parameter. A higher shutter value gives stronger motion blur.
- Please note that turning on motion blur will significantly slow down rendering because a motion trajectory is rendered in each frame instead of a completely still scene.
Tip — Choosing the Right Focal Length
- 0~30mm for wide-angle lenses, which greatly magnify the sense of volume for an object.
- 30~70mm for normal lenses, suitable for clearly showing spatial relationships in the scene.
- 100~300mm for telephoto lenses, with very weak perspective; parallel lines in 3D space are almost parallel in renderings.
Post-Processing
-
Taitopia support image post-processing to preview exposure, color adjustments, and effects before rendering an image or a video.
-
Click the Rest icon on the right of the post-processing settings to clear post-processing effects.
-
Supported post-processing parameters and ranges are given below:
-
Exposure: from -10 to 10
-
Color Temperature: from -1 to 1
-
Color Tint: from -1 to 1
-
Saturation: from -1 to 1
-
Contrast: from -1 to 1
-
Highlights: from -1 to 1
-
Lights: from -1 to 1
-
Darks: from -1 to 1
-
Shadows: from -1 to 1
-
Bloom Intensity: from 0 to 100
-
Bloom Radius: from 1 to 5
-
Bloom Cutoff: from 0 to 10
-