Environment Settings

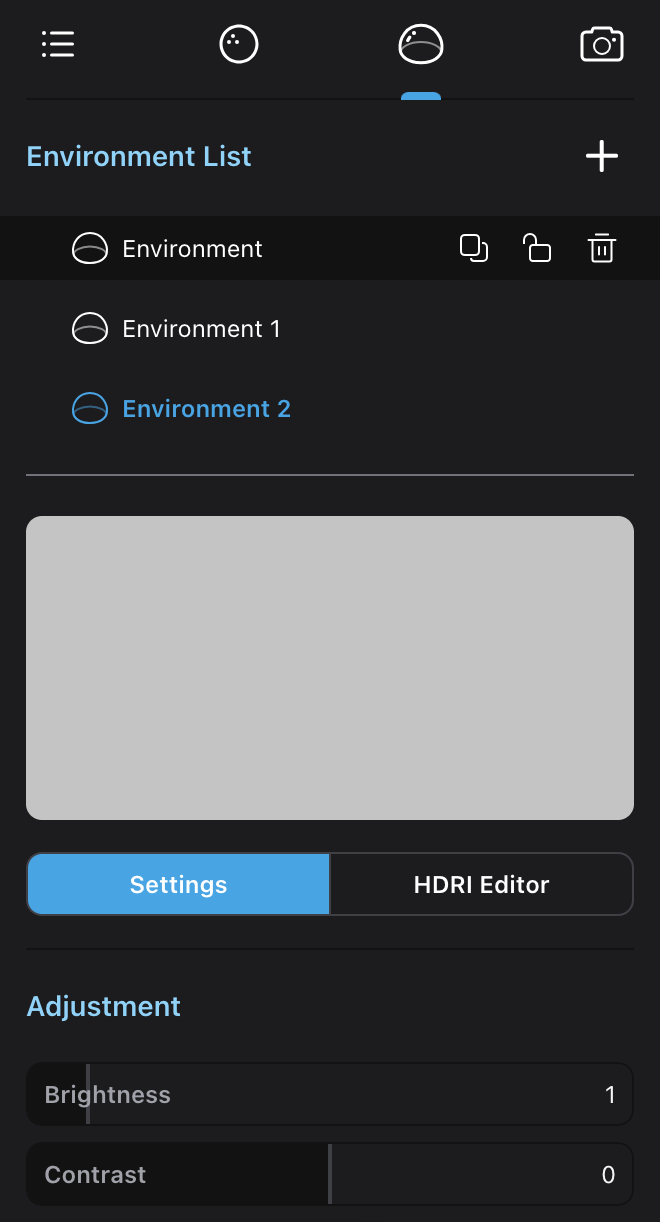
Environment List
- Drag the divider line between the environment list and environment parameters to adjust the ratio of the upper and lower parts.
Activate an Environment
- Click on an environment in the environment list to activate an environment.
Add an Environment
- Click on the Add icon at the top right of the environment list to add a new environment to the list. The default name of the new environment will be “Environment + Number,” and the default environment lighting is a pure grey background.
- Alternatively, you can click or drag an item from the “Environment Set” category in the asset library to add the environment.
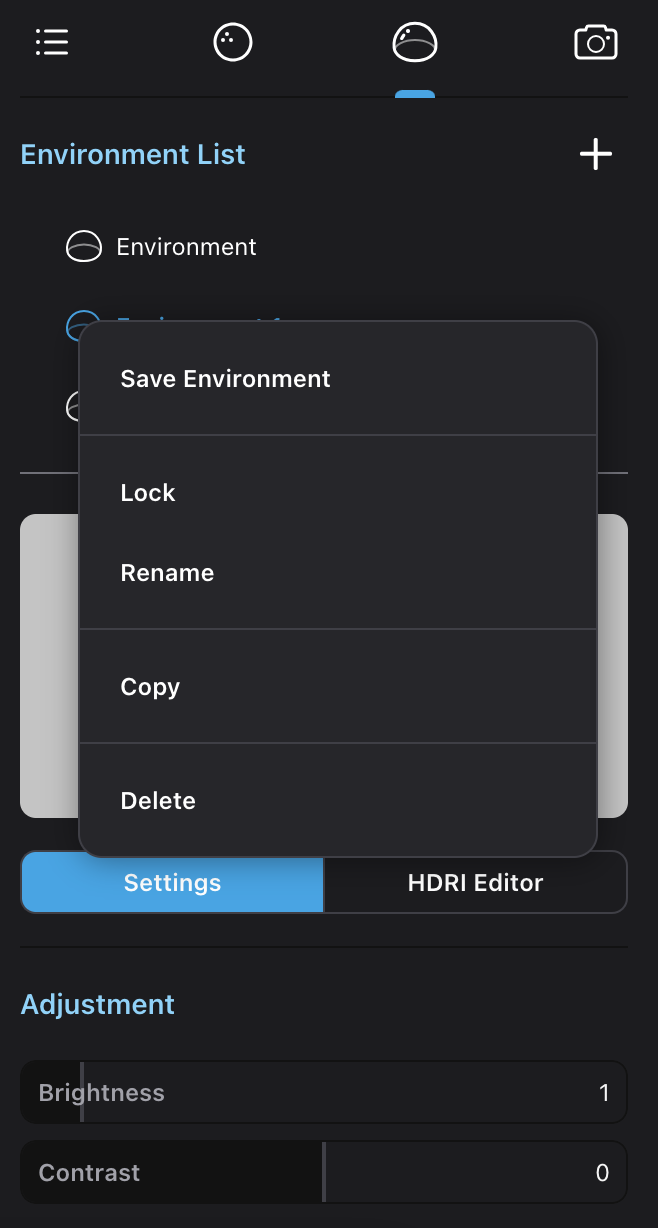
Duplicate, Lock, and Delete an Environment
- Hover over a row in the environment list or open the right-click menu to duplicate, lock, or delete an environment.
Rename an Environment
- Double-click on the environment name on a row in the camera list to rename an environment.
- Alternatively, you can rename an environment from the right-click menu of an environment in the environment list.
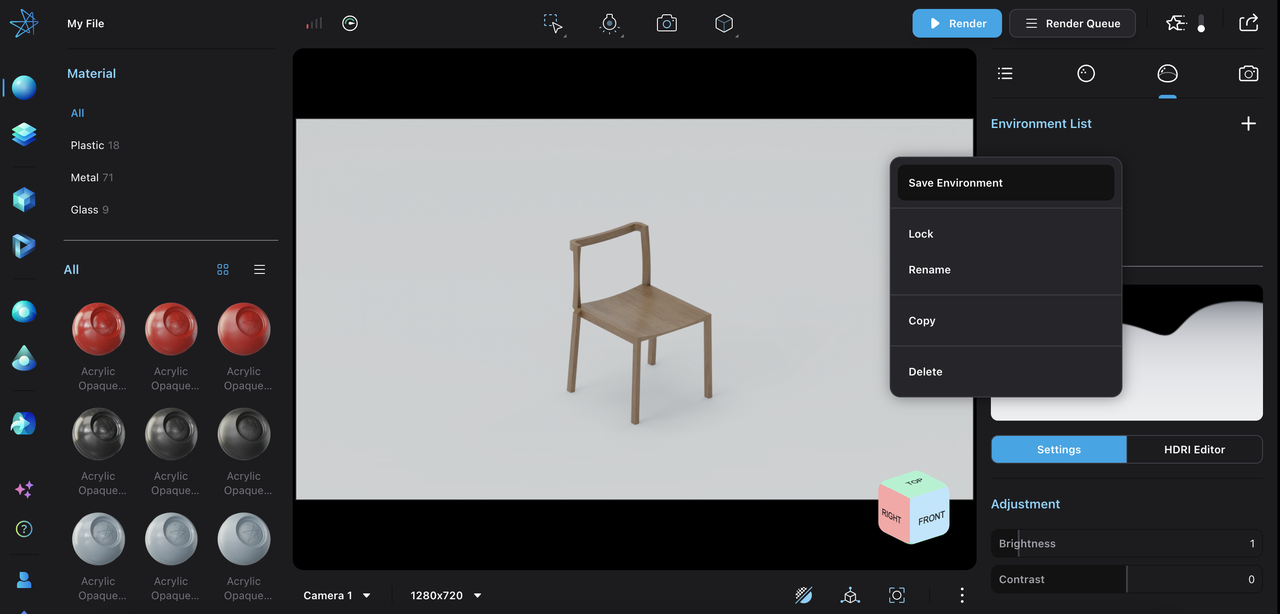
Save an Environment
- Right-click on an environment and then click on the “Save Environment” option to save the environment into your asset library.
- Saved environments can be found in the “Environment” tab when switching to “My Assets” section on the left sidebar.
Basic Environment Settings
Environment Transform
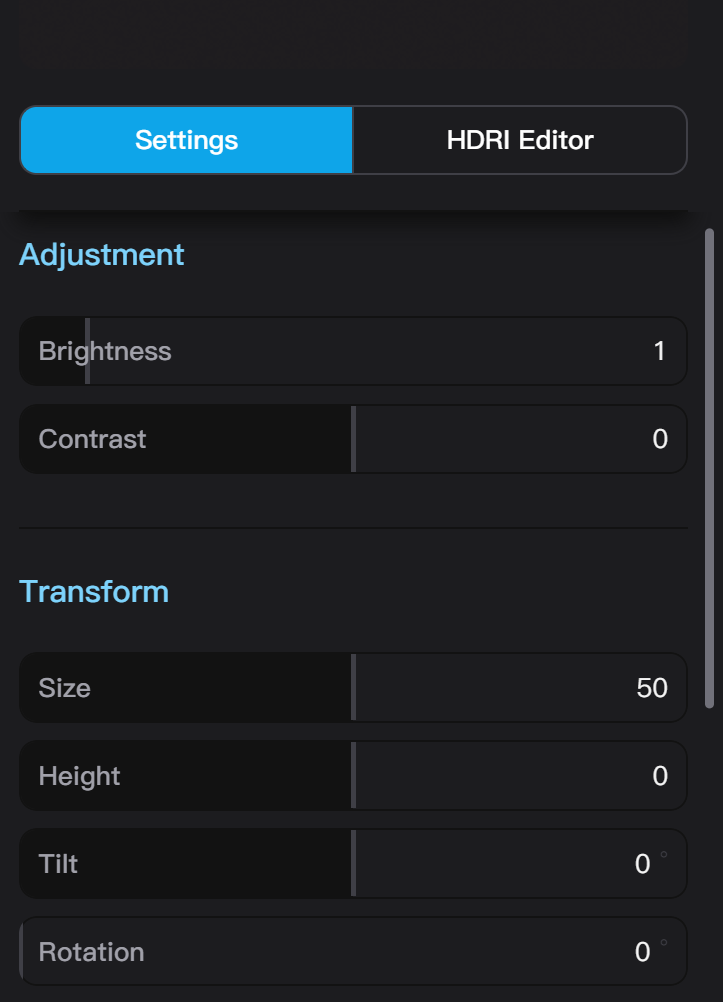
- Click on the “Settings” section to enter the basic environment settings.
- Drag the “Brightness” slider to adjust the brightness of the environment. Available range is 0–10, and the default value 1.
- Drag the “Contrast” slider to adjust the contrast of the environment. Available range is -1–1, and the default value is 0.
- Drag the “Size” slider to adjust the size of the environment in unit of meters. The default environment size is 50 meters.
- Drag the “Height” slider to adjust the relative height parameter of the environment to its diameter. Available range is -0.5–0.5, and the default value is 0.
- Drag the “Tilt” slider to adjust the tilt angle of the environment. Available range is -180–180 degrees, and the default value 0 is degrees. The tilt axis of the environment is the forward (Z) axis of the world coordinate system.
- Drag the “Rotation” slider to adjust the rotation angle of the environment. The default value is 0 degrees. The rotation axis of the environment is the up (Y) axis of the world coordinate system.
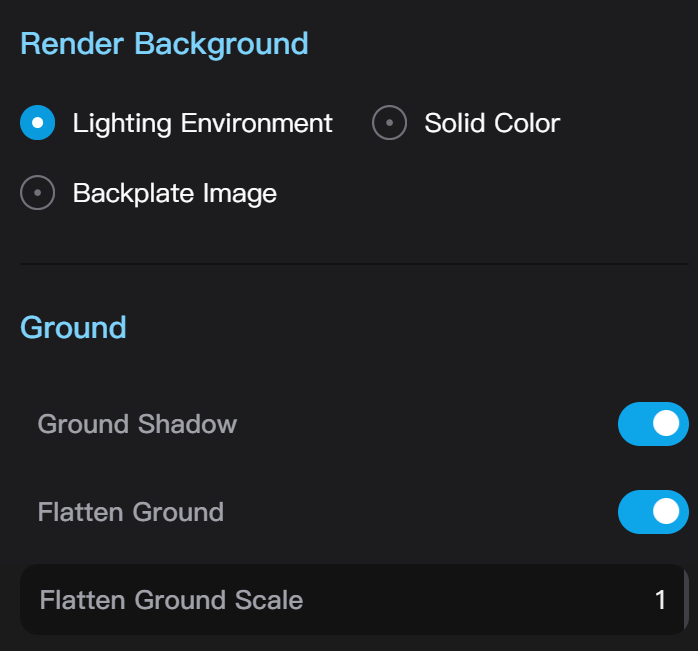
Render Background
-
Click on the “Lighting Environment” option to use the current environment lighting (HDRI map) as the background.
-
Click on the “Color” option to switch the rendering background to a solid color.
-
Click on the “Backplate Image” option to switch the rendering background to a custom image.
- It is recommend to lock the active camera when using a backplate image since the perspective in the backplate image is independent to the current 3D viewport.
- Backplate image is not effective in Free Roam and will fall back to the lighting environment.
Ground Settings
-
Click on the “Ground Shadow” switch to toggle ground shadow effects. When turned on, shadows will appear on a virtual ground plane located at y=0 in the world space. Ground shadows are also effective when rendering with a transparent background.
-
Click on the “Flatten Ground” switch to change the lower half of the environment from spherical to flat.
- The “Flatten Ground Scale” parameter can be used to adjust the flattening effect. Increasing the parameter will stretch the center of the ground and compress the periphery, and vice versa.
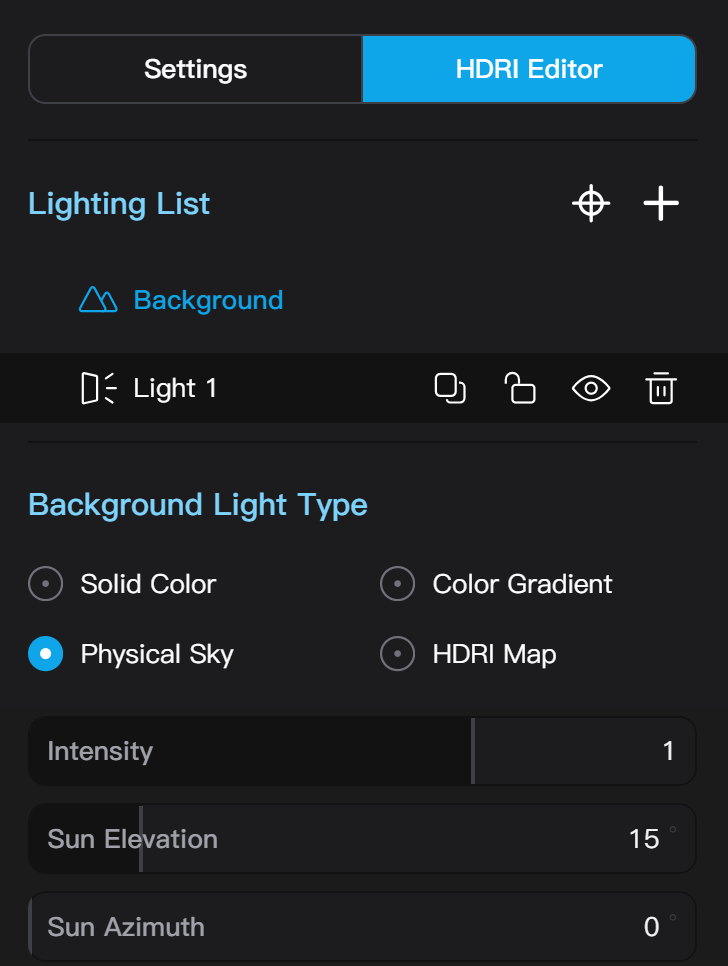
HDRI Editor
Lighting List
-
Click on “HDRI Editor” to edit HDRI light sources in an environment, including creating new light sources, adjusting background lighting, and adjusting existing ight sources.
-
The light source list displays all HDRI light sources created by the user. Click on a light source to select it for editing.
- Alternatively, you can click on the light source in the environment texture thumbnail.
Move a Light Source
- Drag the HDRI light source in the environment texture thumbnail to change its position.
- After clicking on an HDRI light source to select it, Click on “Adjust Highlight Position” (Aim icon) on the right of the environment list, then click or drag on the object surface in the rendering viewport to precisely set the highlight position. After adjusting, Click on “Done” above the viewport to finish the operation.
Add or Delete a Light Source
-
Click on “Add Light Source” at the top right of the light source list to add a new HDRI light source to the list. The default name of the new light source will be “Light Source + Number.”
- Alternatively, you can Ctrl/Cmd + left-click in “Adjust Highlight Position” mode to add a new light source.
Copy, Locking, Hide, and Rename a Light Source
-
In the light source list, Hover over a light source (except the default “Background Light”) to access actions like “Copy,” “Lock,” “Hide,” “Delete,” etc. Click on the respective icons to perform these actions.
- Alternatively, you can access these actions from the right-click menu of a light source
-
Hover over a light source, then double-click to rename it.
- Alternatively, you can open the right-click menu and then Click on “Rename.”
Edit Background Lighting
-
Click on the options “Solid Color,” “Color Gradient,” “Physical Sky,” and “HDRI Map” to switch between these types of background lighting.
-
Click on the “Solid Color” option to switch the background light type to solid color.
-
Click on the “Color Gradient” option to switch the background light type to a two-tone gradient.
-
Click on the “Physical Sky” option to switch the background light type to physical sky.
- Drag the “Intensity” slider to adjust the sky light intensity. The higher the “Intensity” parameter, the brighter the sky light, the larger the area of the object illuminated, and the harder and more solid the shadows produced by the light source.
- Drag the “Sun Elevation” slider to adjust the sun's elevation angle in degrees.
- Drag the “Sun Azimuth” slider to adjust the sun's azimuth angle in degrees.
- Drag the “Sun Diameter” slider to adjust the sun’s diameter.
- Drag the “Sun Intensity” slider to adjust the intensity of the sun. The higher the “Sunlight Intensity” parameter, the stronger the sunlight, the larger the area of the object illuminated, and the strength of the shadows produced by the light source changes accordingly.
- Drag the “Scene Elevation” slider to adjust the elevation of the scene. The higher the parameter, the lower the sun is from the horizon, and the harder and more solid the shadows produced by the light source.
- Drag the “Atmosphere Density” slider to adjust the density of the atmosphere. The higher the parameter, the more the sunlight is scattered, and the warmer the scene; the lower the parameter, the colder the scene.
- Drag the “Dust density” slider to adjust the dust density of the atmosphere. The higher the parameter, the more dusty the air, the more the sunlight is scattered, and the warmer the scene; the lower the parameter, the colder the scene.
- Drag the “Ozone Density” slider to adjust the ozone level. The lower the parameter, the thinner the ozone layer, the lower the sunlight intensity, and the weaker the diffused light effect.
- Drag the “Scene Height” slider to adjust the height of the scene. The higher the parameter, the greater the distance of the scene from the horizon, and the angle of the shadows produced by the light source changes accordingly.
-
Click on the “HDRI Image” option to switch the background light type to a custom image.
- You can save the uploaded HDRI texture as other textures, and also adjust transform settings separately from the background texture.
Editing a Light Source
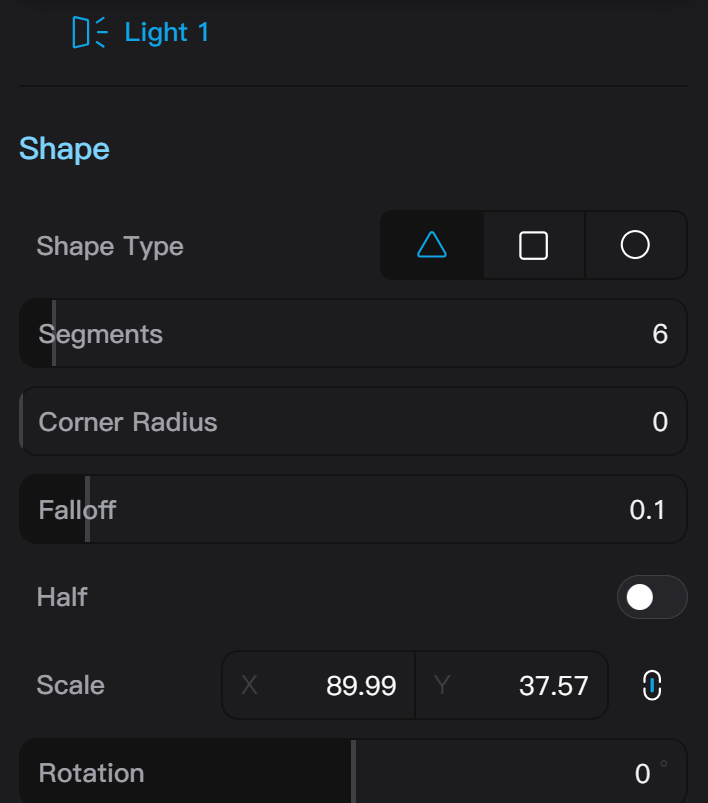
- Click on the shape options to switch the HDRI light source to “Polygon,” “Rectangle,” or “Circle.”
- Adjustable light source transform parameters include Segments (for polygons), Corner Radius (for polygons and rectangles),** Falloff, Half, Scale, and Rotation.**
- When the “Half” switch is turned on, only upper half of the shape is used as the light source.
- Click to activate “Half” mode to set the HDRI light source shape to half of the preset shape.
- Drag the “Scale” slider to adjust the size of the HDRI light source in unit of degrees. The range of the scale parameter is between 0 and 90 degrees exclusive.
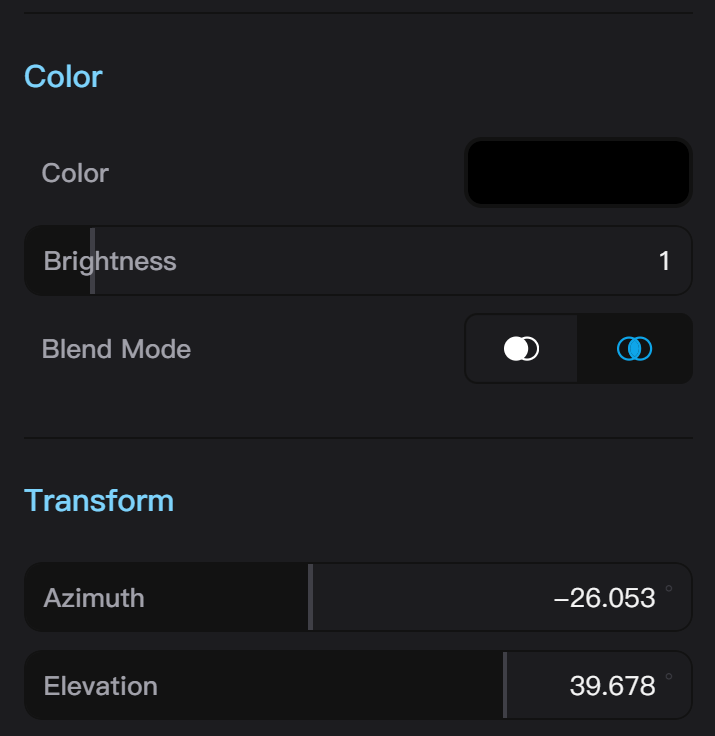
- Click on the color input box to open the color selection panel, where you can choose the color of the light source.
- Drag the “Brightness” slider to adjust the brightness of the HDRI light source.
- Click on “Add” or “Overlay” to switch the blending mode of the HDRI light source. The overlay order of light sources is determined by their positions in the Lighting List.
- Drag the “Azimuth” slider to adjust the azimuth angle of the HDRI light source between -180 and 180 degrees.
- Drag the “Elevation” slider to adjust the elevation angle of the HDRI light source between -90 and 90 degrees.